
Are you constantly updating dates in your Excel report titles? Or maybe you’ve been embarrassed by forgetting to update the title before sending out your Excel report? This post will show you how to automate dates in an Excel title, ensuring your report titles always reflect the latest data from your dataset, making them accurate and up-to-date without the hassle
Introduction
When you create a report in Excel it is good practice to have a title on the worksheet so anyone, including yourself, can easily understand what they are looking at. Another excellent practice for Excel report creators to get in the habit of is including the date range or time period that the report covers, again this shows management and non-technical users of the report exactly what time-frame your report covers. This is critical when making management decisions from the Excel report.
For example, a basic sales report created in Excel might look something like the following:
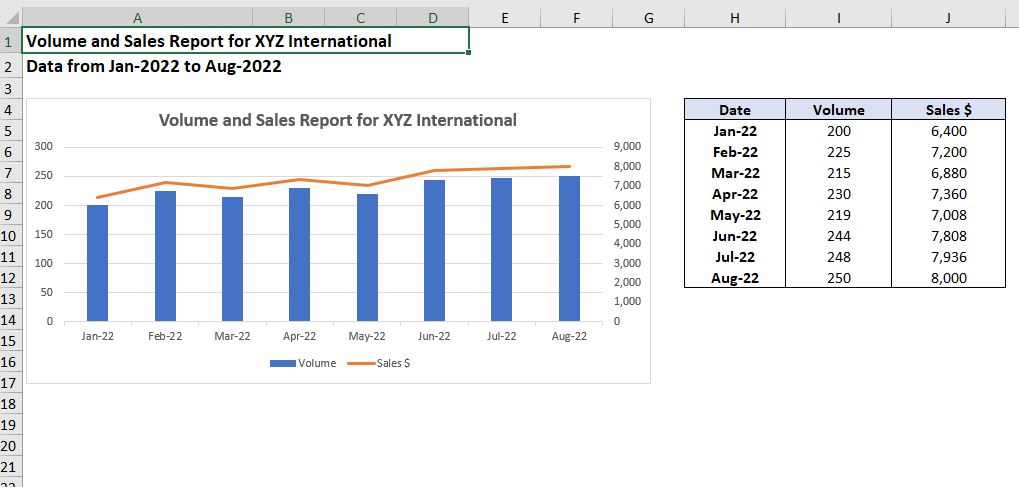
This is a basic standard report that many Excel users who work in offices around the world will have constructed in some form during their time.
As you can see the report clearly identifies what we are looking at, Volume and Sales figures, and for the time period we are looking at, January 2022 to August 2022. This is great and it will leave even the most non-technical manager with a clear understanding of exactly what they are looking at.
The Issues with a Standard Excel Title
Excel users often encounter the issue of outdated date ranges in report titles, a problem that can even trip up experienced developers rushing to prepare reports for important meetings. This discrepancy between the title and the actual data, such as a title indicating August data while the chart shows September, can lead to confusion and inaccuracies, particularly for managers who rely on these reports for decision-making.
Understanding how to automate dates in an Excel title is crucial to maintaining accuracy and clarity in your reports, ensuring that your data is always presented correctly and professionally.
The Solution – Dynamic Excel Report Titles
The best solution you can adopt as an Excel developer is to automate the dates in the report title from the actual dataset, making it dynamic.
This way when you refresh your data with new months, or perhaps you run a report for an entirely different time period, you do not have to update the title. The title will update automatically and your manager will never get confused, and even better you will never be embarrassed by making this type of rookie mistake.
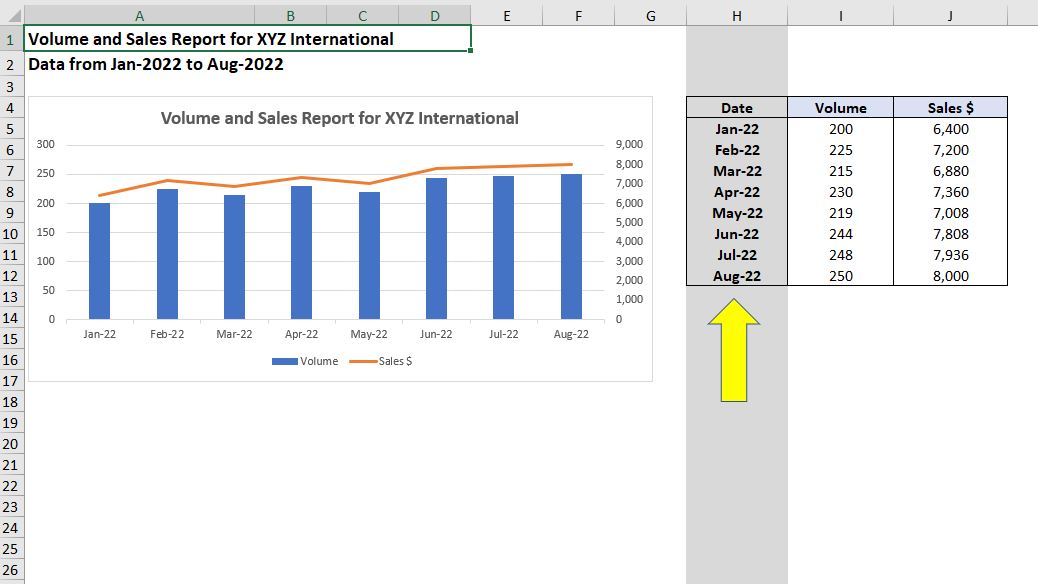
The first step is to identify your date range in the data. In this example our date range is in column H:
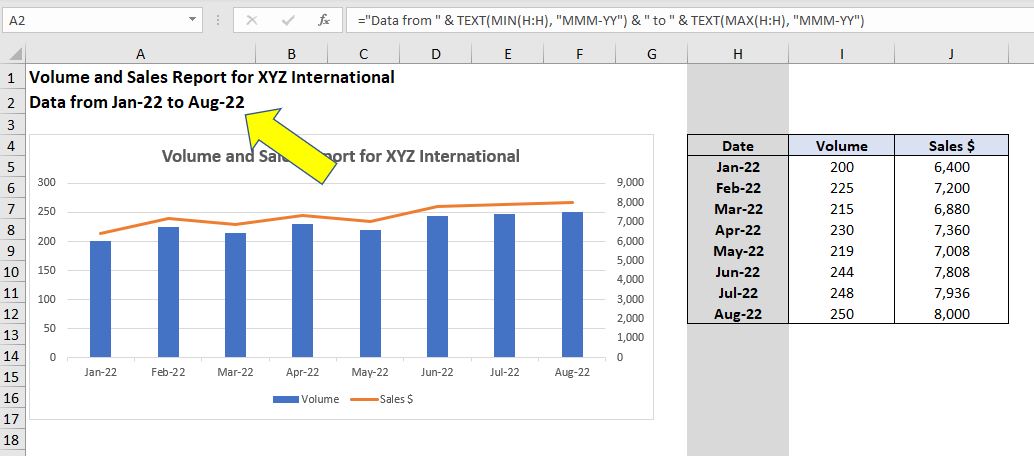
The second step is to change the date range title, in this case in cell A2, to a formula rather than plain text.
The formula to use is as follows:
- =”Data from ” & TEXT(MIN(H:H), “MMM-YY”) & ” to ” & TEXT(MAX(H:H), “MMM-YY”)
Understanding the Formula
The formula combines some plain text “Data from ” and “ to ” along with the formulas TEXT, MIN and MAX which do the date automation part.
As the date range in this example is in column H we first look for the minimum value in column H (MIN) and that is your starting date. Next you take the maximum value in column H (MAX) and that is the ending date.
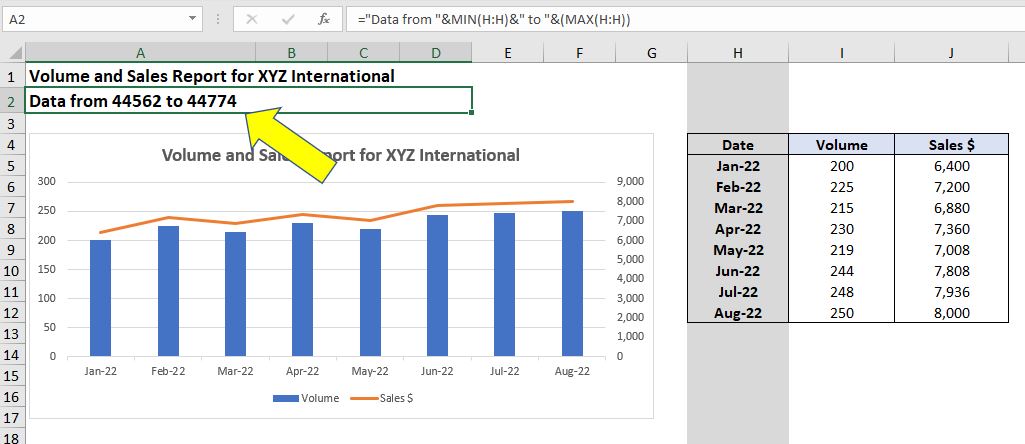
Excel stores dates as numerical values so that is why you are able to use the MIN and MAX functions. However, that does mean it will return numerical values if you don’t use this in conjunction with the TEXT function.
The TEXT function allows you to convert numerical values into text, in this case a text version of the date that everyone can understand, the text month and the year (MMM-YY). If you didn’t use the TEXT function your title would instead show numerical values that will mean nothing to anyone:
Always remember you need to convert the numerical dates back into text when using this formula. That way your title will always be perfect!
Additional Tips
An additional tip for when you automate dates in an Excel title are that you can change the TEXT function to show the date however you like. For example if you wanted the date format to show the whole month name and not a shortened version then you would simply change the formula to:
- =”Data from ” & TEXT(MIN(H:H), “MMMM-YY”) & ” to ” & TEXT(MAX(H:H), “MMMM-YY”)
A subtle change of adding another “M” but that will return the full month name, i.e. January instead of Jan. Equally you can change the year to show the full year instead of the last two digits by changing the formula to:
- =”Data from ” & TEXT(MIN(H:H), “MMMM-YYYY”) & ” to ” & TEXT(MAX(H:H), “MMMM-YYYY”)
The extra “YY” will mean your date will show 2022 instead of 22.
Summary
In summary, this article provides a detailed guide on how to automate dates in an Excel title, addressing the frequent problem of outdated report titles.
By using a straightforward formula that combines TEXT, MIN, and MAX functions, you can ensure your Excel report titles automatically update to display the correct date range. This technique not only minimizes errors but also enhances the overall accuracy and professionalism of your reports.
Additionally, the article includes valuable tips on customizing date formats in titles to meet various preferences.
Keep Excelling,

Now that you’ve learned how to automate dates in an Excel title for more accurate reporting, why not enhance your Excel skills further? Check out our guide on how to create an interactive Excel chart with a scroll bar. This advanced technique will not only make your reports more dynamic but also impress your audience with its user-friendly functionality.