
At DedicatedExcel.com, we believe in empowering every user, irrespective of their technical prowess. Today, we’re focusing on how to assign a macro to a button in Excel – a straightforward approach that streamlines tasks and enhances user experience. This guide is designed to help even beginners navigate this process with ease.
Setting the Scene
Imagine this: You’ve created a complex Excel macro for streamlining tasks. To make it user-friendly, simply assign the macro to a button. This offers a one-click solution, sparing non-technical users from the complexities of VBA or scripts.
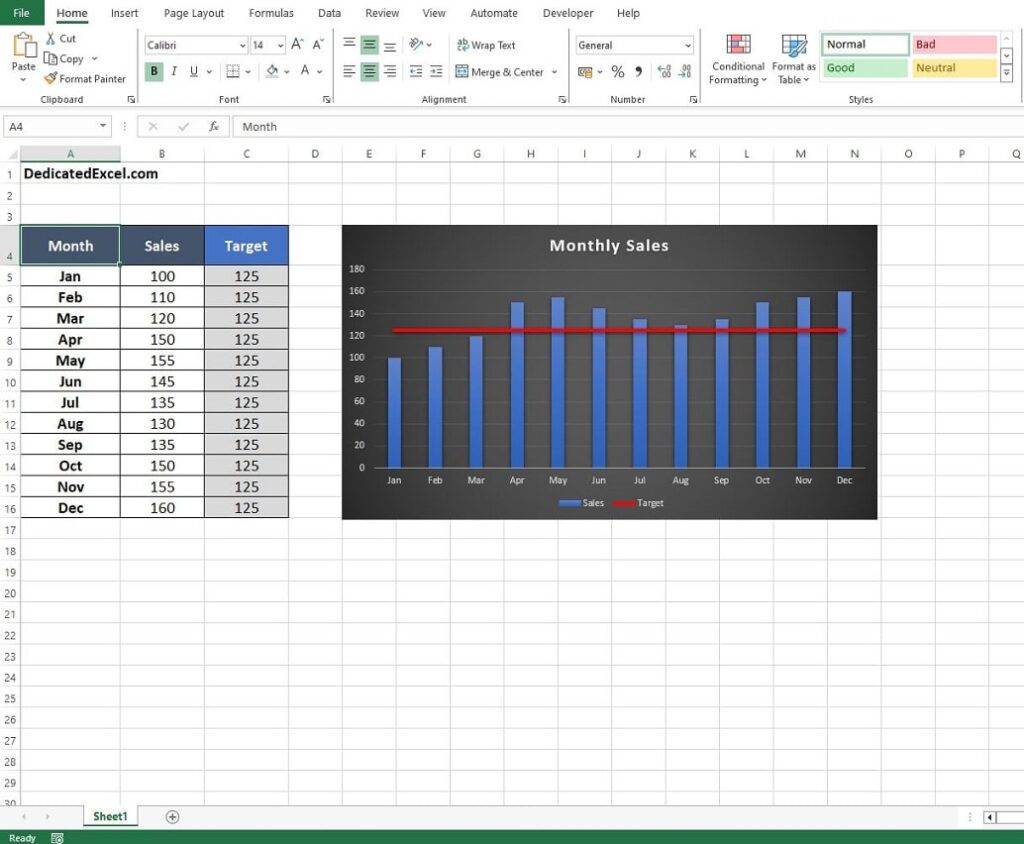
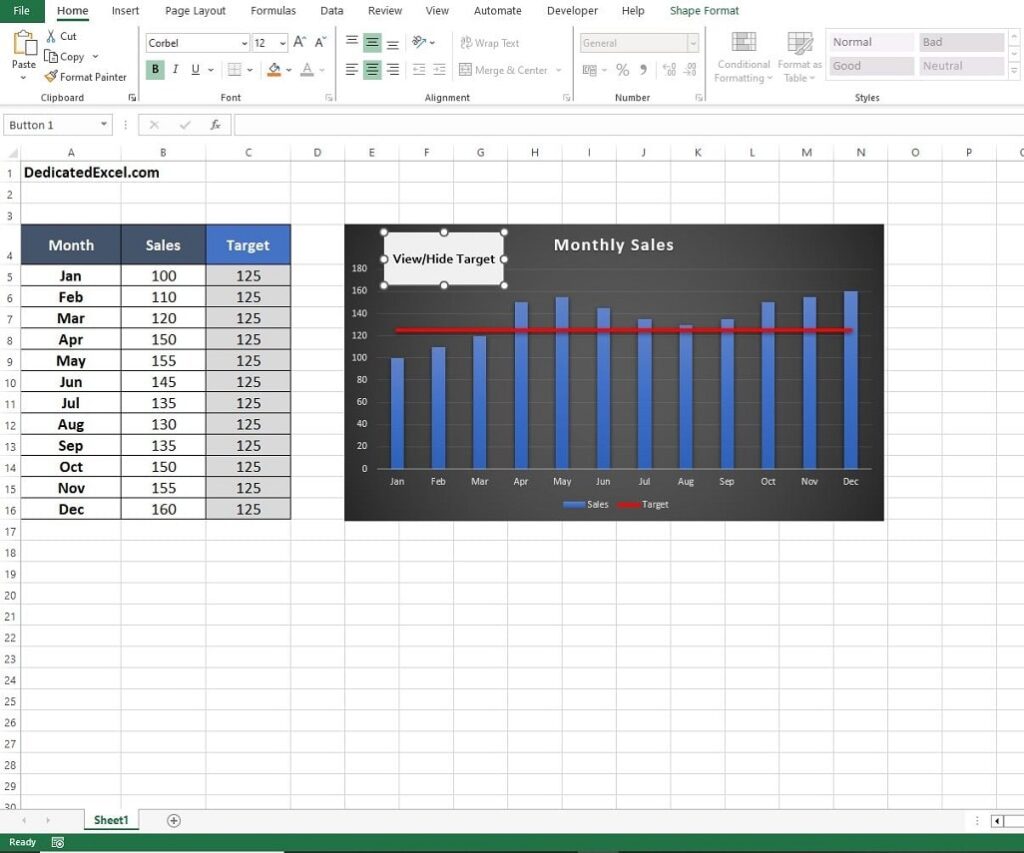
Consider, a situation where a client requests a specific feature on their latest Sales Report. They want a button that allows them to toggle the display of Target Sales on an Excel chart. By assigning a macro to a button, you can provide this functionality seamlessly.
Here’s how it can transform the user experience:
- Ease of Use: By simply clicking a button, users can execute complex tasks without needing to understand the underlying code. This approach is especially beneficial in a professional setting where efficiency and user-friendliness are paramount.
- Customization: You can tailor the button to fit the specific needs of the report or the user’s request. In the case of the Sales Report, the button could be labelled “Toggle Target Sales”, providing a clear and direct way for the user to interact with the chart.
- Visual Appeal: A well-designed button not only serves a functional purpose but also enhances the overall aesthetic of the report. It can make the report more engaging and easier to navigate, particularly for users who may not be familiar with Excel’s more advanced features.
- Versatility: The ability to assign a macro to a button is not just limited to toggling chart features. It can be applied to a wide range of functions, such as automating data entry, filtering data, or even creating interactive dashboards.
Step 1: Creating the Button
The first step to assign a macro to a button is to create a button in your Excel file. The placement of this button depends entirely on your report’s layout and functionality. For instance, if the macro updates a chart, place the button near the chart for easy access. Alternatively, if the macro relates to the entire report, consider adding a separate worksheet featuring the button prominently.
Here’s how you do it:
- Go to the ‘Developer‘ tab on the Excel ribbon. If its missing you can find out How to Add the Developer Tab in Excel from this post.
- Click ‘Insert‘ and then select the button icon.
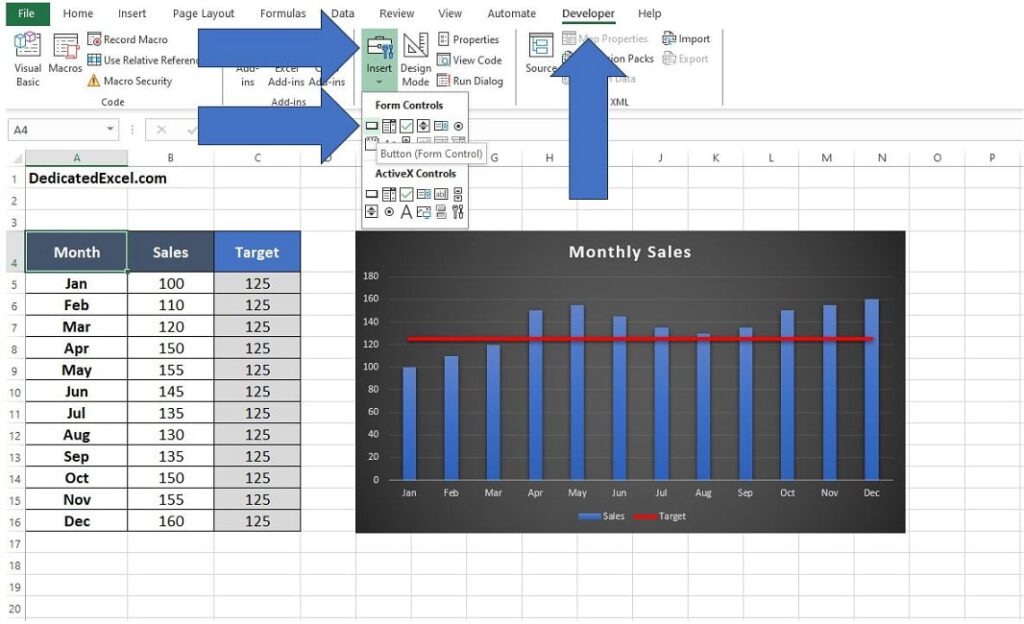
After you select the button icon, your cursor will change to a cross shape. Drag it across your desired location to draw the button (you can resize and move the button after creating so don’t worry too much about exact layout initially).
Step 2: Assigning the Macro
As soon as you release the mouse button, Excel will prompt you to assign a macro to this new button. This dialog box will display all the macros available in your workbook.
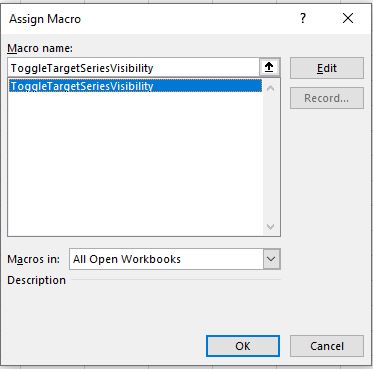
- Simply select the macro you wish to assign.
- Click “OK” to finalise.
- You’ll now see a button linked to your macro on the worksheet.
Step 3: Customising the Button
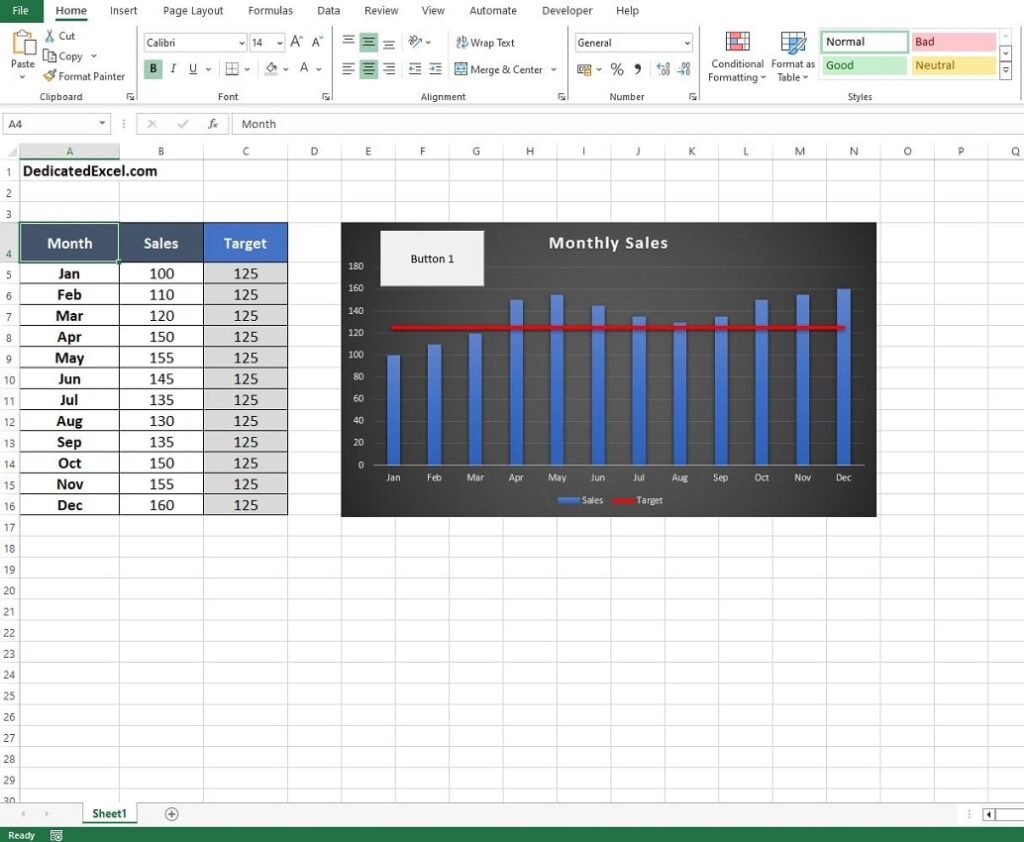
By default, the button will be labelled as “Button 1”, which isn’t particularly helpful for non-technical users. To make it more user-friendly:
- Right-click the button and select “Edit Text” to rename it appropriately.
- You can also adjust the text format by right-clicking and choosing “Format Control”.
Step 4: Test the Button
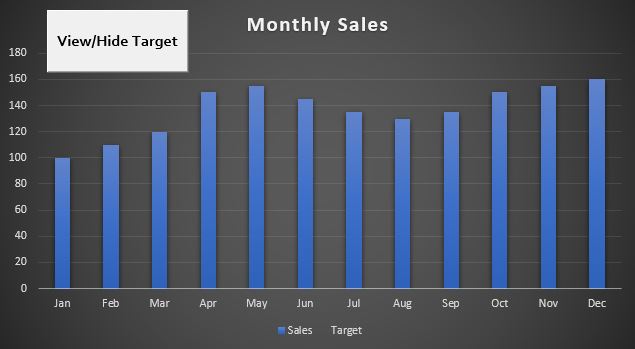
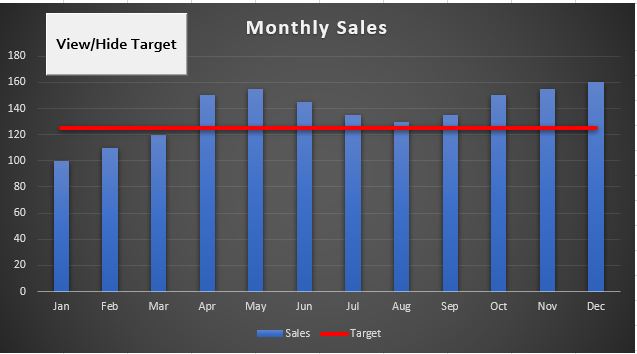
Lastly, it’s essential to verify the functionality of the button to ensure it performs as intended. In our current example, the button is designed to toggle the visibility of the Target Sales (illustrated by a red line on the chart) on and off with each press. This feature allows our client to customize their viewing experience with ease.
Upon clicking the button for the first time, the desired effect is immediately evident: the Target Sales line becomes hidden, demonstrating the button is working as intended:
Clicking the button a second time and the target sales becomes visible again.
Summary
Assigning a macro to a button in Excel is a straightforward yet powerful technique that greatly enhances spreadsheet usability, especially for non-technical users. This method streamlines complex processes, offering a time-saving solution that benefits all users.
By following these simple steps to assign a macro to a button, you can transform your Excel reports into more accessible and efficient tools. This not only boosts productivity but also solidifies your reputation as a skilled Excel user, capable of creating intuitive, user-friendly reports.
Keep Excelling,

Now you’ve mastered assigning macros to buttons, why not level up further? Explore our guide on ‘How to Create Your Own Excel Function‘ and customize Excel to your needs!