
Ever found yourself staring at a spreadsheet, wishing there was a magic wand to instantly rearrange your rows into columns and vice versa? That’s the common dilemma when working with large sets of data in Excel. The solution? Transpose in Excel. This feature is like your data’s fairy godmother, transforming the layout of your spreadsheet with ease and precision.
By learning how to transpose data, you’re not just changing the orientation of your data; you’re unlocking a more efficient way to present and analyse information.
In this post, I’ll guide you through the steps to master this transformative skill, providing real-world examples to illustrate its practical applications. Get ready to revolutionize the way you handle data in Excel!
Table of Contents
What is Transposing?
Transposing data in Excel is a technique for switching around the rows and columns in an existing set of data. A common reason for doing this is to change records and variables around when they have not been captured in the appropriate format for performing data analysis or creating charts in Excel.
How to Transpose Data in Excel
There are two methods for transposing data in Excel, the first using a Copy and Pasting method and the second using Excels TRANSPOSE function. Let’s look at both methods to transform some data in Excel.
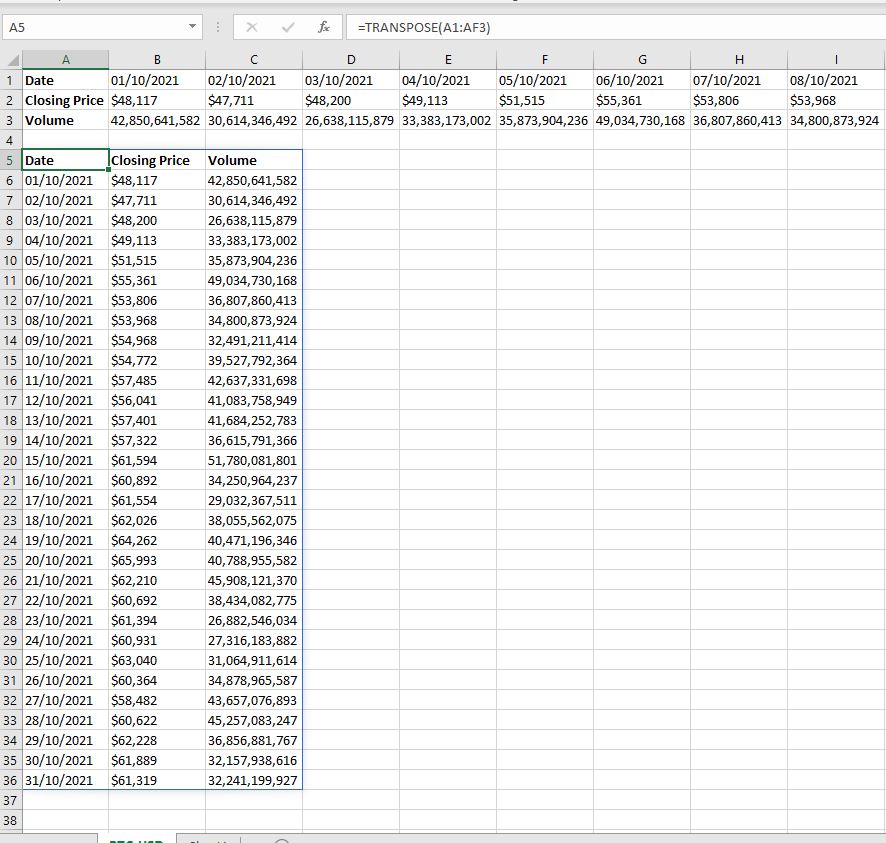
The following image shows a list of Bitcoin prices and volumes, by day, captured from another source. The image shows that the data is captured in column format so in other words each column shows a new date, price and volume.
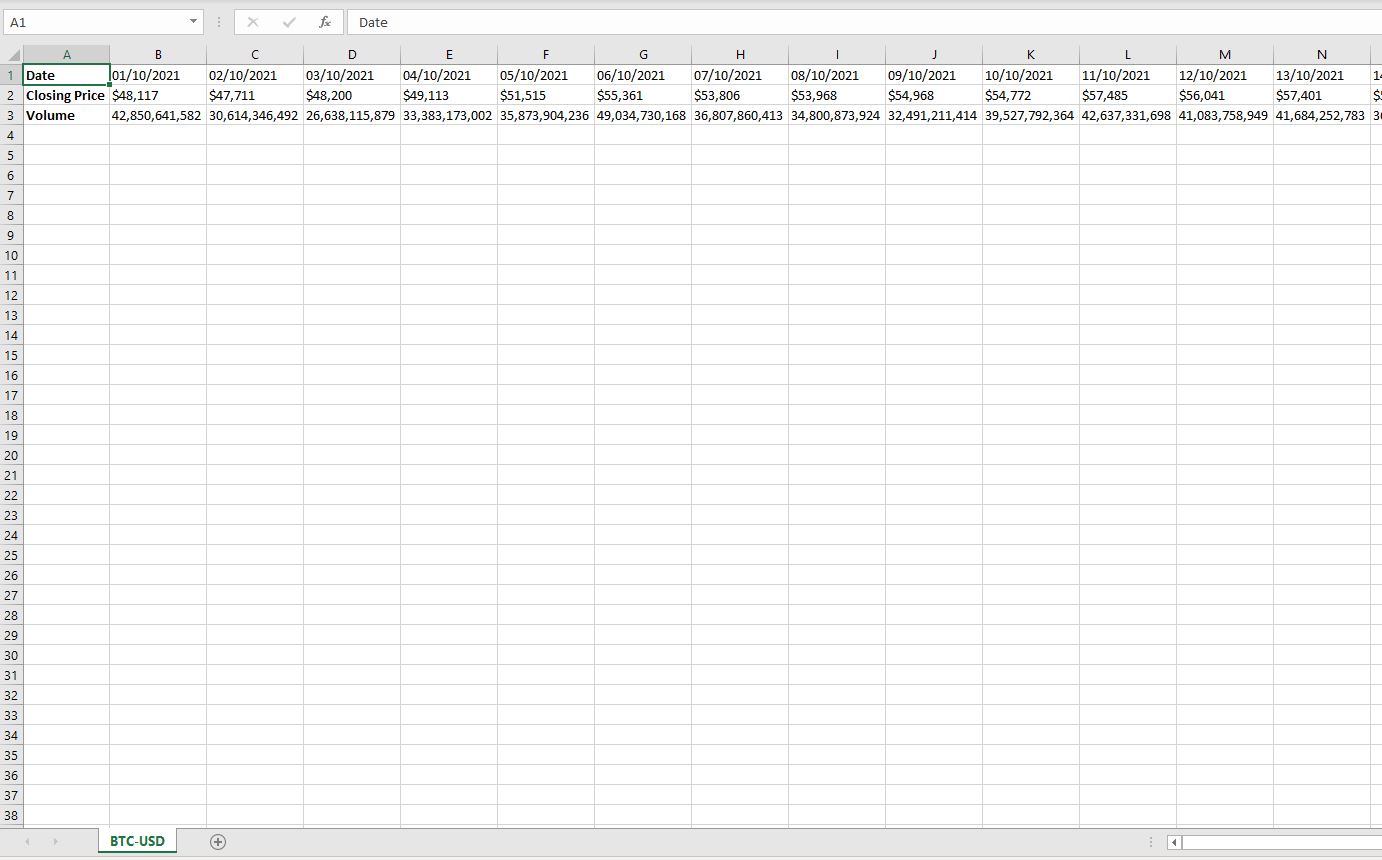
If you wanted to put that data into a table, maybe to perform additional analysis, the current format is not suitable. It would be more user-friendly to have one column containing the dates, one column with the price and another with the volume.
This is where transposing the data in Excel becomes a key skill to have.
Copy and Paste Method
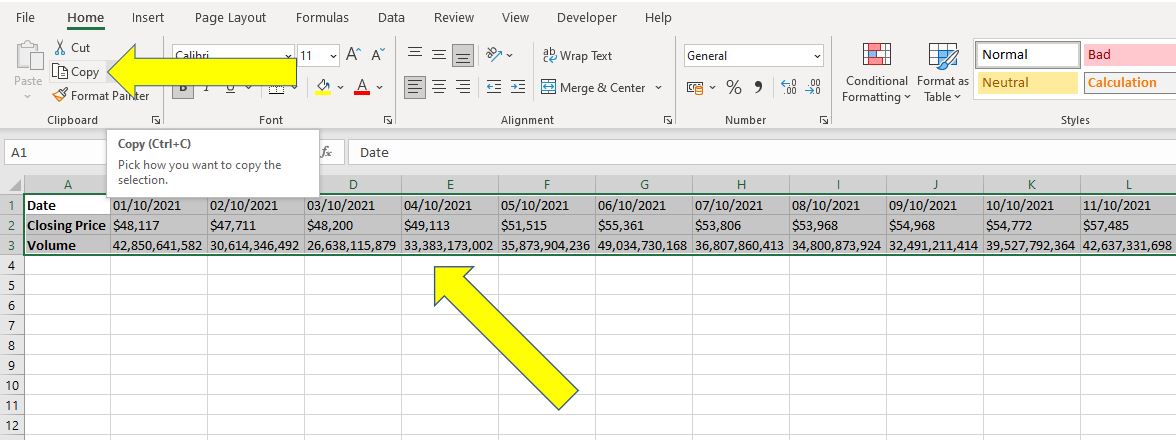
First select all of the data to be transposed. Then select copy by clicking the Copy icon or use the shortcut command CTRL + C.
Now the data has been copied to the clipboard you have to choose where to paste the transposed version of the data. This can be on a the existing worksheet, a new worksheet or even a new Excel workbook.
For this example we will paste the data on the same worksheet starting in cell A5.
To do this select cell A5, then select the drop down arrow below the Paste Icon. This shows the Paste options and from that options box select the Transpose option.
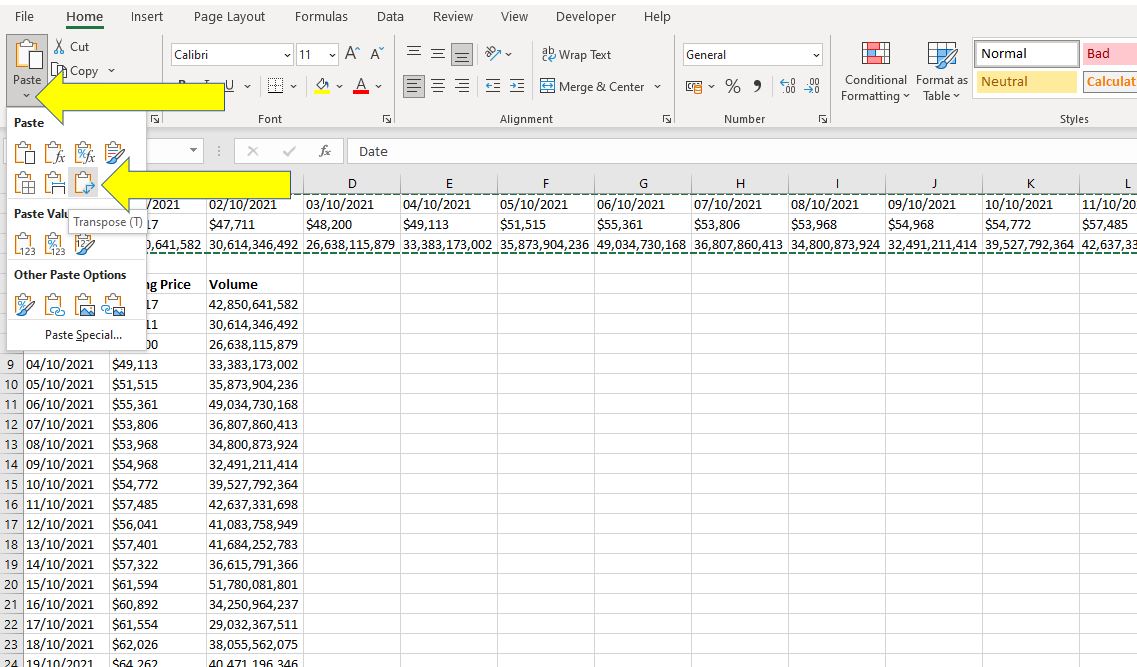
If you just hover the cursor over the Transpose icon the data will show up, this acts as a temporary view so you can see exactly what the data will look like before you click the icon.
Clicking the Transpose icon completes the process and you can see the data has now been transposed into the different format.
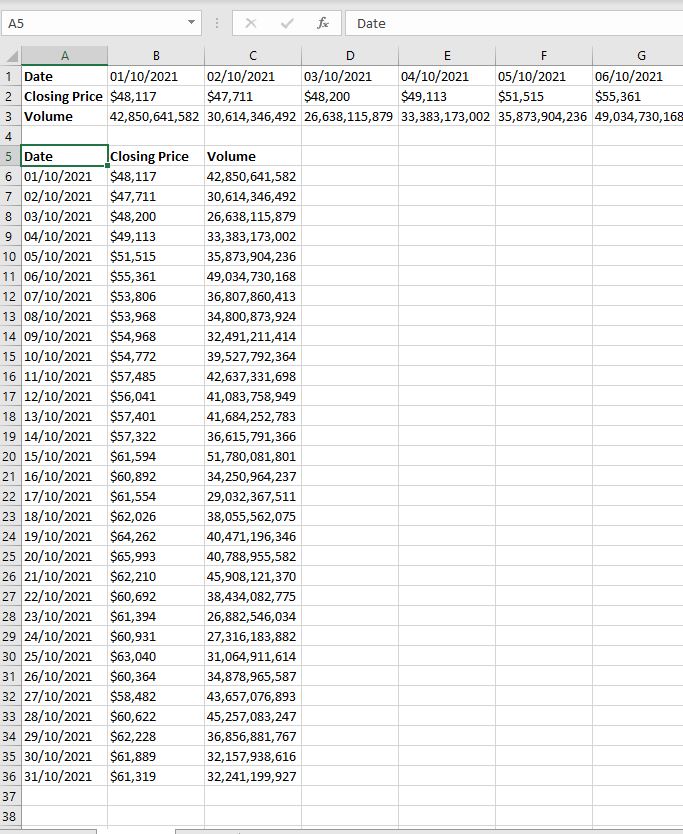
The copy paste method does exactly what it says, it takes a copy of the original data and then transposes it. If you make any changes to the original data nothing will change in the transposed data, this means you can delete the original data if you no longer require it.
However, there may be times where you want to retain the original format, perhaps because it will be refreshed or updated, and you want the transposed version to automatically update when any changes are made. This is where you can use the TRANSPOSE function in Excel.
TRANSPOSE Function Method
Using the original example the data can be transposed with an Excel function, this is the TRANSPOSE function and takes the format:
- =TRANSPOSE(Array)
This is where Array refers to the range of cells that you want to transpose.
In the example we have a month of Bitcoin prices and volumes in the range A1 to AF3 therefore the formula to enter in cell A5 would be:
- =TRANSPOSE(A1:AF3)
The result shows the data is transposed in the same way as previously achieved with the copy and paste method.
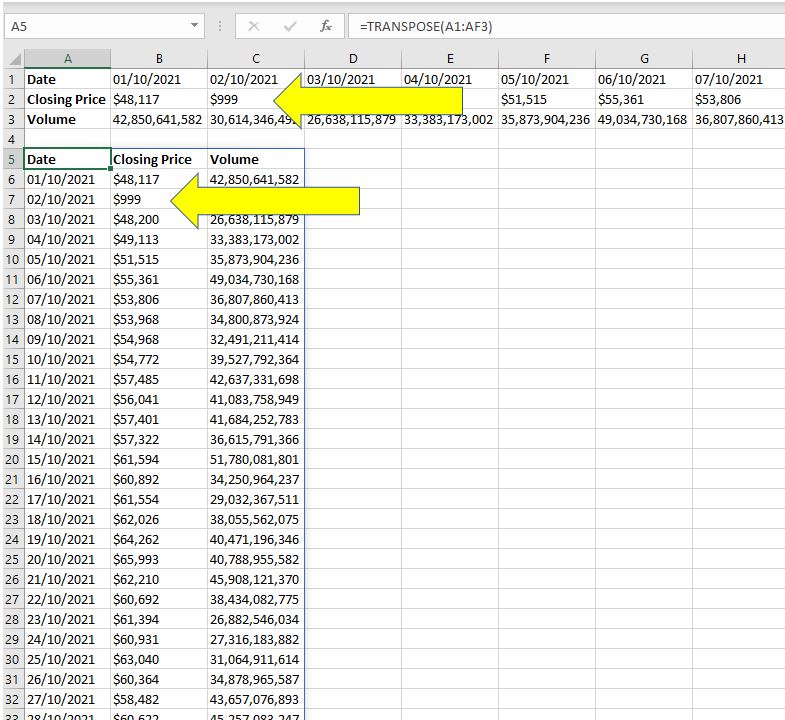
Remember, this method effectively links to the original data so if you delete the original data the transposed version will also disappear.
Equally if you change the original data, for example change the price in cell C2 to $999 the transposed data will automatically update.
Summary
In conclusion, understanding how to transpose data in Excel, either through the copy and paste method or the TRANSPOSE function, is a valuable skill for organizing and analyzing your data more effectively.
These techniques allow you to switch rows to columns and vice versa, making your data presentation more flexible and suited to your needs. As a beginner, mastering these methods can significantly improve your efficiency and accuracy in Excel.
Continue exploring and practicing these skills to become more proficient in managing your Excel data.
Keep Excelling,

Elevate your Excel skills after mastering Transpose Data! Dive into our How to Create a Drop Down List in Excel guide for another essential skill that boosts data management and interactivity.