Have you ever opened Excel and thought, “What more can I do with this?” Well, in “Beginners Guide to the Excel Visual Basic Editor,” you’re about to find out.
Imagine unlocking a whole new world within Excel, a place where customization and automation go beyond what you thought possible. I’m here to take you through this hidden gem, the Visual Basic Editor, in a way that’s easy and approachable for beginners.
Let’s embark on this journey together and discover the untapped potential within your Excel spreadsheets!
Table of Contents
Introduction
Following on from the Introduction to Excel VBA for beginners this post will provide a Beginners Guide to the Excel Visual Basic Editor, covering how you locate the Editor and what the different windows in the Editor mean.
Learning these Excel VBA Basics will provide you with a solid foundation to progress in your VBA development
Locating the Visual Basic Editor (VBE)
The Visual Basic Editor in Excel or VBE for short is found under the Developer tab in the Excel Ribbon.
If the Developer Tab is not on show in the Ribbon when you open your Excel workbook then you need to change the Excel Options to show it and there is a post here for those of you in that position.
When the Developer Tab is selected the Excel Ribbon will change to look similar to below:

For now we will focus on the Code sub-section of the Ribbon (far left in most cases) as that contains an icon for Visual Basic, if you click on that icon you open up the Visual Basic Editor in Excel.
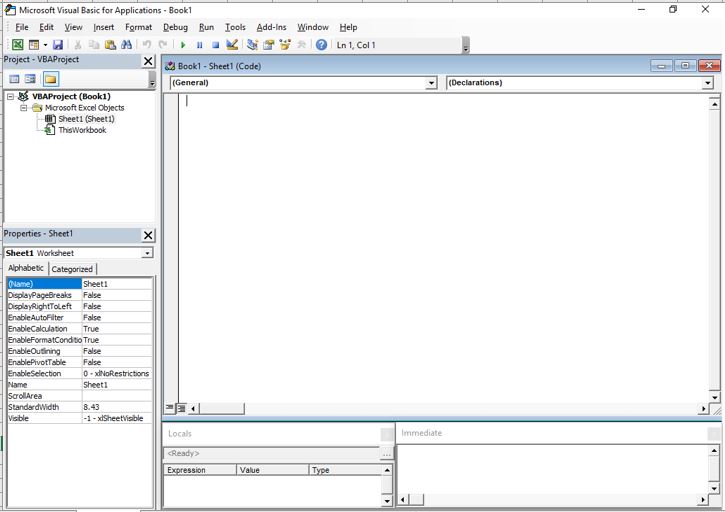
The Visual Basic Editor in Excel can seem a bit daunting the first time you see it but fear not it becomes easier with a little bit of knowledge.
Visual Basic Editor Overview
All of the Windows in the Visual Basic Editor can be re-sized, moved or even hidden from the Editor to increase the space allowed for other Windows.
If a Window that you want to view is not on show then click on View from the top menu bar and select the Window you want to see from the drop down menu.
A word of caution when it comes to moving and resizing Windows in the Visual Basic Editor is that is can be quite tricky to get them back to the default view if you decide to.
The Menu Bar
The Menu Bar is located at the top of the main Visual Basic Editor Window. This sort of Menu Bar will be familiar to all software users and it contains all of the commands to use the various features of the Visual Basic Editor in Excel.

A useful feature in the Menu Bar is to go into View > Toolbars and select some of the additional toolbars that are not on show by default, toolbars that are on show already will have a check mark next to them.
This will produce Icons or Shortcuts below the menu bar that will make you more efficient as your experience with VBA grows.
There are toolbars for Editing Commands, Debugging Commands and User Form Commands along with the Standard Toolbar.
The Project Window
There are a number of Windows on view when you first open the Visual Basic Editor in Excel, to start the Window in the upper left corner of the Visual Basic Editor is the Project Window.
If you can’t see the Project Window click on View > Project Explorer in the top menu or use the shortcut command of CTRL+R
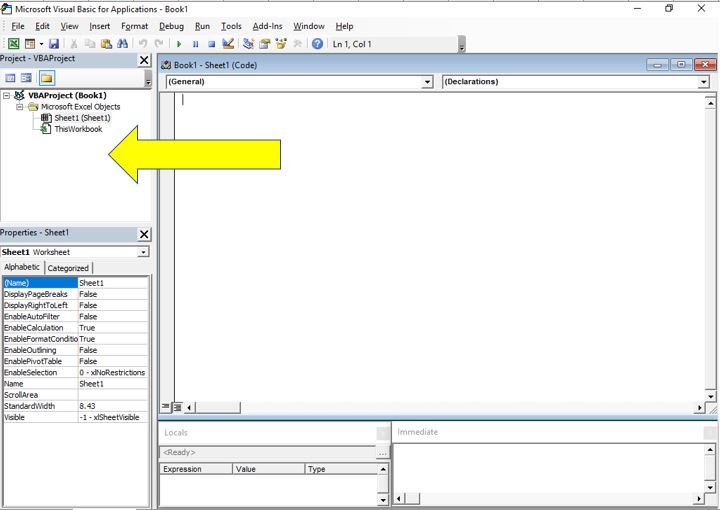
The Project Window contains the map of your VBA Projects in the Workbook. Each VBA Project is arranged like a tree that branches out so you can expand out to see the lower levels of the project, or contract the tree to show less information.
The highest level of the tree is the VBA Project itself and beneath that you will find any Microsoft Excel Objects that are in the project.
When expanded this folder shows the the Worksheets that are in the Excel Workbook along with an Object called ThisWorkbook. Here you can make the VBA code specific to a particular worksheet or something that applies to the entire Excel Workbook. If Additional Excel Objects are added to the VBA Project, User Forms for example, they will appear in this folder.
Notice that if you select between the Objects, for example click on the ThisWorkbook object, the Properties Window below the Project Explorer Window changes.
The Properties Window
By default the Properties Window lives under the Project Explorer Window in the lower left of the Visual Basic Editor in Excel. If you do not have your Properties Window on show select View > Properties Windows from the top menu or use the shortcut command of F4.
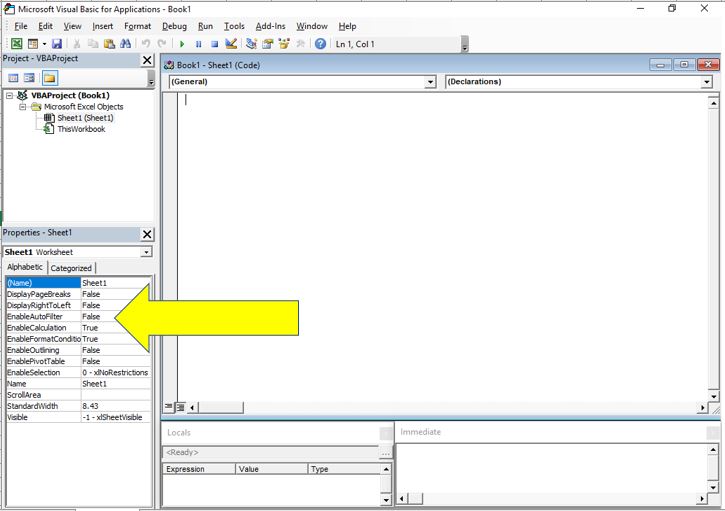
The Properties Window displays the Properties for the selected object in the Project Window. In this Window you can make changes to the Excel Object such as changing the name of a worksheet or hiding it from view.
One of the most useful features in this Window is to set a Worksheets visibility status to xlSheetVeryHidden, this is great for Excel Dashboards where you have reference sheets and data sheets that you want to keep out of sight or from being tampered with.
The Code Window
The Code Window is where the magic happens! The Code Window is usually the largest Window on view and is found in the centre of the Visual Basic Editor. If for some reason your Code Window is not activated you can bring it back on screen by selecting View > Code Window from the menu bar or by using the shortcut command of F7.
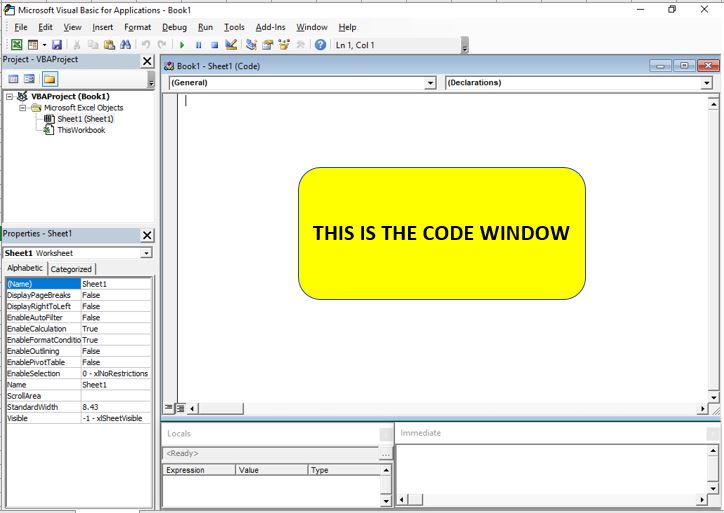
As the name suggests the Code Window is where all of your VBA code is written, these are your instructions to Excel. For this post you just need to be aware that it exists but in the next post we will look at the Code Window in more detail to get you started creating VBA code.
Debugging
The remainder of the Windows found in the Visual Basic Editor are related to Debugging your VBA code, debugging is the term used when you are resolving errors in your VBA code.
Errors in your VBA code is quite common when you are starting out so expect to generate a few of them, it’s all part of the learning curve.
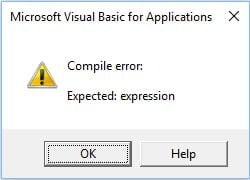
An excellent feature in the Visual Basic Editor is that it compiles your VBA code after you start each new line of code. This will immediately tell you, by way of an error message and then by highlighting the offending code in red, that your VBA code is not quite right and needs to be reviewed.
Equally if there is nothing wrong with your syntax, i.e. the code has been written correctly but when it comes to Excel executing the code it finds an error you will get a slightly different error message, for example:
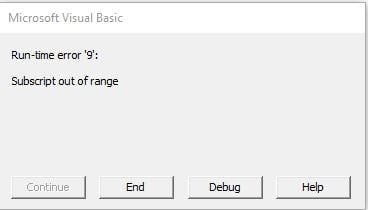
On the negative side these error messages are rarely descriptive enough to highlight the exact problem but on the positive side if you get this error message simply click on the Debug button and Excel will open up your VBA code in the Visual Basic Editor and highlight the line of code causing the problem, like below:

The Immediate Window
The Immediate Window is usually located at the bottom of the Visual Basic Editor, if you can’t see the Immediate Window you can bring it on screen using View > Immediate Window in the menu bar or by using the shortcut command of CTRL+G.
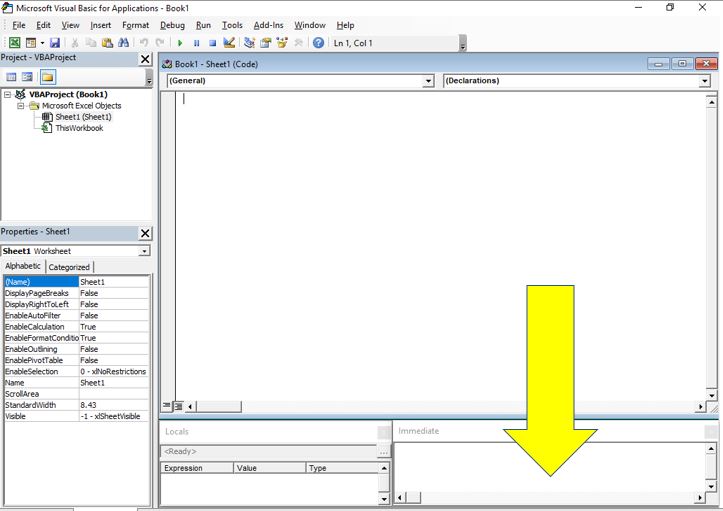
By using the Immediate Window you can test what values your code is assigning to variables at different stages of the script. For example if you have a variable called TaxRate that is created in your code you can use the Immediate Window and enter the code Print TaxRate and it will return the current value for TaxRate.
The Immediate Window can also be used to test smaller portions of code before you include them into the main code window so it becomes more helpful with larger scripts.
The Locals Window
The Locals Window tends to be located at the bottom of the Visual Basic Editor, if you can’t see the Immediate Window you can bring it on screen using View > Locals Window in the menu bar, there is no shortcut command.
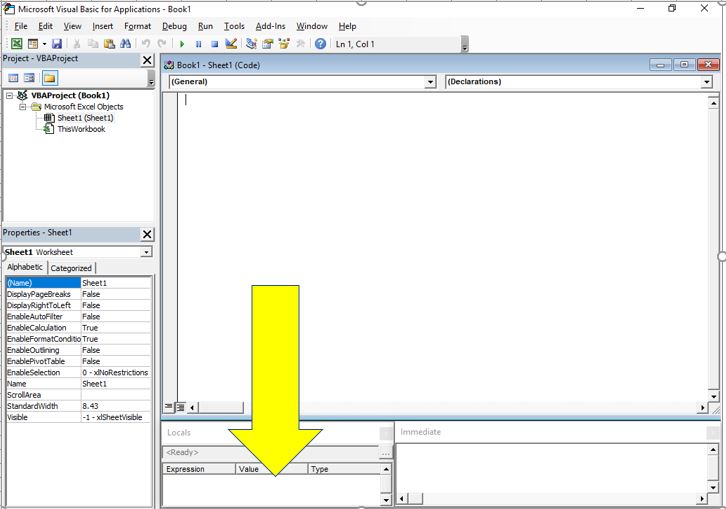
The Locals Window is useful when you are in break mode as it will show you a list of all variables that are local to that current procedure. Break Mode is when your code is stopped during the process before it completes.
This display can be useful as it will tell you the variable name, the current value and the current data type at the point of break which is useful if you have variables that are recalculated multiple times during the procedure.
The Watch Window
Another Debugging aspect of the Visual Basic Editor is the Watch Window. By default this Window is not on show when you open Excels Visual Basic Editor but it can be activated by selecting View > Watch Window from the top menu bar.
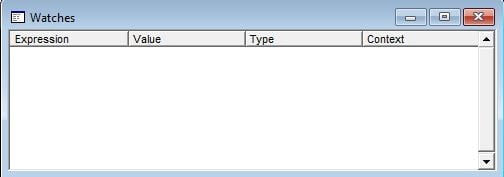
The Watch Window comes is useful when you have scripts that loop or iterate through vast data sets, for example perform a test on cells A1 to A20000.
Within the Visual Basic Editor you can Add a Watch point to the code and this will inform Excel to go into break mode when it reaches a certain point in the loop, for example after iteration number 5000.
By using this technique it is possible to find out what values are currently assigned to different variables in your code at the exact point of break. It is similar to the Local Window but obviously if you had to try and manually stop your code while it is on iteration 5000 out of 20000 you might have trouble, just Add a Watch and use the Watch Window to save yourself hours of trouble.
Summary
In conclusion, this guide has equipped you with a foundational understanding of the Excel Visual Basic Editor, exploring its various windows and functionalities. As you continue to develop your VBA skills, remember that practice and exploration are key.
Dive deeper into the world of Excel VBA by exploring more advanced topics and challenges. Keep experimenting, keep learning, and most importantly, keep excelling in your Excel journey. For more in-depth guides and tips, continue exploring at DedicatedExcel.com.
Now that you’ve mastered the basics of the Excel Visual Basic Editor, take your automation skills further by learning how to open a Word document from Excel using VBA. Discover the seamless integration between Excel and Word, and how VBA can bridge these powerful applications. Explore our guide ‘How to Open a Word Document from Excel with VBA‘ to unlock new levels of productivity and efficiency in your projects.


