Save in Excel – this phrase might seem straightforward, yet it’s a crucial skill often missed by beginners. Many Excel users know surprisingly little about the nuances of saving files.
Did you know, for instance, that using an XLSB file might be more efficient for your needs, or that a client might require the file in XLSM format?
If you’re keen to learn not just how to save your Excel file but also to discover some additional handy tips, then this guide is for you. Let’s dive in and unravel the secrets of saving in Excel!
Table of Contents
- Introduction to Save in Excel
- The Save Function
- The Save As Function
- How to Save with Excel – Walkthrough
- Summary

Introduction to Save in Excel
After spending lots of time and effort producing an Excel Dashboard the most critical part you would hate to overlook is making sure your file is saved correctly.
There are two ways to save in Excel; using the ‘Save’ function or the ‘Save As’ function and they both have the same basic principle in that they will allow you to save your file.
The Save Function
This will save your file using the name, file-path and file type that you have already set. If this is the first time you are saving the Excel file then it will automatically launch the Save As Function.
- Automatic Saving: If you’re saving your Excel file for the first time, the ‘Save‘ function will automatically activate the ‘Save As‘ function. This is a smart feature designed to ensure your file is properly named and stored.
- Regular Updates: For subsequent saves, using the ‘Save‘ function will update your file with any new changes. It remembers the file name, location (file-path), and file type (like .xlsx or .csv) that you initially set. This makes it incredibly convenient to keep your document up to date with just a click.
The Save As Function
This allows you to name the Excel file, set the file-path (the location where the file will be saved) and also set the file type which you may or may not want to change from the default setting.
While the ‘Save‘ function is great for quick updates, the ‘Save As‘ function offers you more control:
- Name Your File: This is where you give your document a unique name. Think of it as the identity of your file.
- Choose the Location: Decide where on your computer or network you want to store the file. This is the file-path. It’s like choosing a digital drawer for your document.
- Select the File Type: Excel allows you to save your work in various formats. The default is usually .xlsx, but you might need to change it depending on your needs or the requirements of your project.
How to Save with Excel – Walkthrough
Starting Out
To save your Excel file start by clicking on the ‘File’ menu tab from the Excel Ribbon. This can be found in the top left corner of the Excel window.
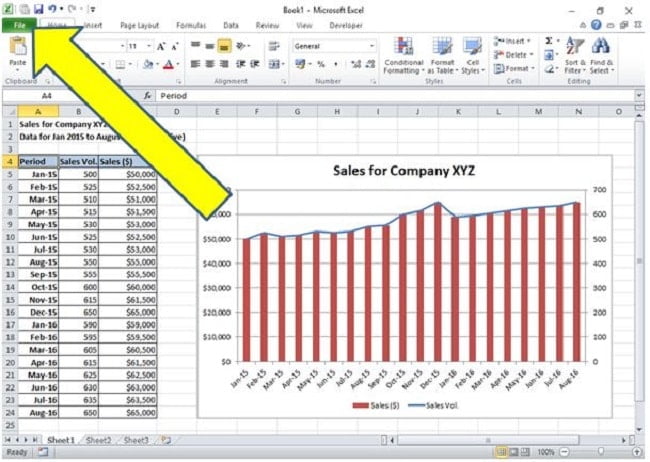
In the File menu click on ‘Save’ or ‘Save As’ which again will be found in the top left corner for your convenience:
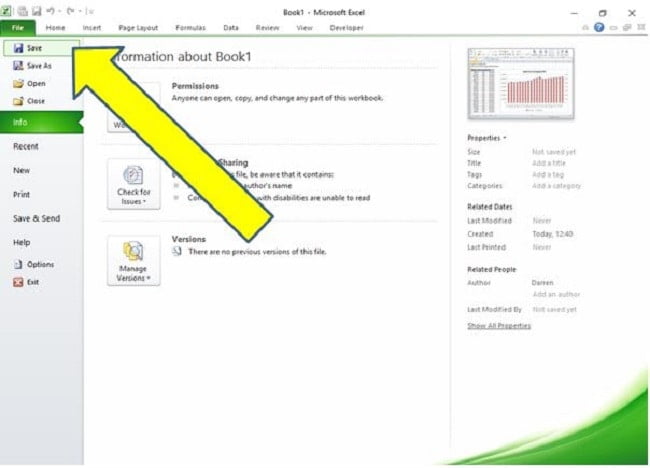
Note: If this is the first time you have saved this particular file then you will be presented with the ‘Save As‘ window, if you have already saved the file then clicking on Save will just save the file without opening any additional windows.
Assuming this is the first time you have saved the Excel file then the ‘Save As‘ window will appear, the folders on show may vary a little depending your system but the basic layout will be the same as shown below:
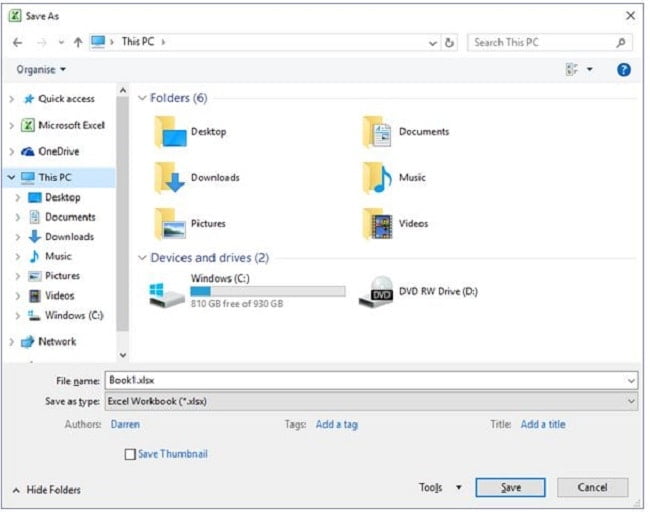
You now have a few choices to confirm:
- Where you want the file to be saved, known as the ‘File-Path’ or ‘Location’.
- What you want the file to be called, known as the ‘File Name‘.
- What type of file you want to use when saving, Excel has over 20 options although the default for many of you will be a standard Excel Workbook, also known as an XLSX file.
File Locations
Select the location by navigating to the folder that you want to save the file in.
This is done by clicking on ‘Folder’ or Location in the left side of the window and then double clicking on a folder within that area if you want to save the file somewhere specific.
For example to save in a location in the ‘Documents‘ folder, in a sub-folder called ‘Excel files’ you would first click on ‘Documents‘ in the left window pane:
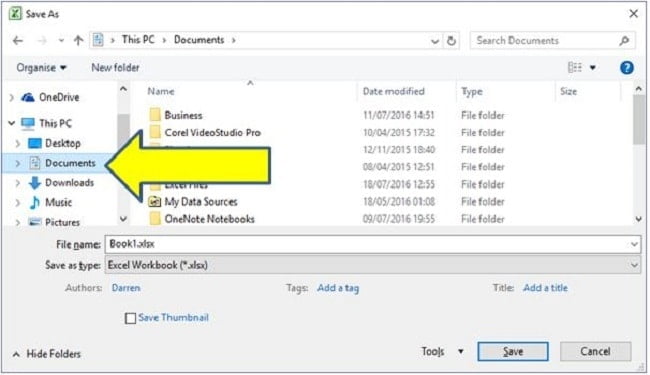
Then you would double-click on the sub-folder called’ Excel Files’ in the main window pane:
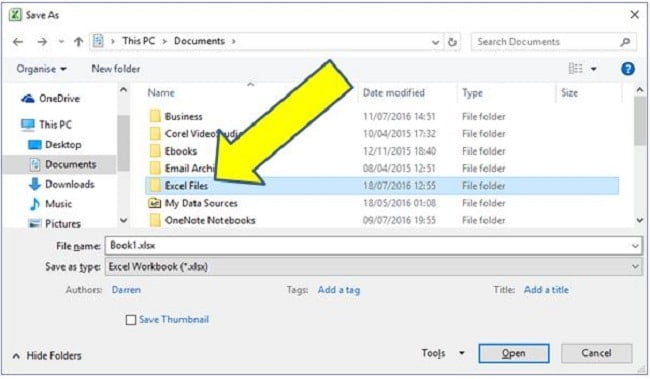
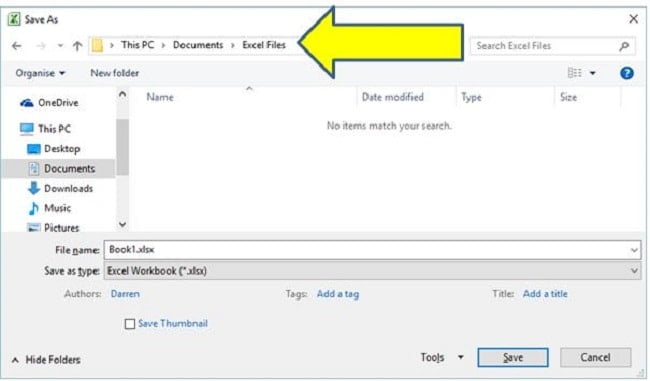
You can confirm the location by checking the file address bar at the top of the window, in this example it shows the file will be saved on ‘This PC’, in the ‘Documents’ Folder, in a Sub Folder called ‘Excel Files’:
Naming Conventions
When naming your Excel file, choose a name that’s clear and easy to remember.
Avoid using special characters like colons and question marks. The name shouldn’t be longer than 255 characters; if it is, Excel will show an error. Including a descriptive name will help you quickly find the file later, especially if you save in Excel often and have many files in one folder.
Remember to save in Excel with a name that reflects the file’s content to make it easier to identify.
As standard every new Excel file is called Book1 so all you need to do is change that part in the File Name box as shown below:
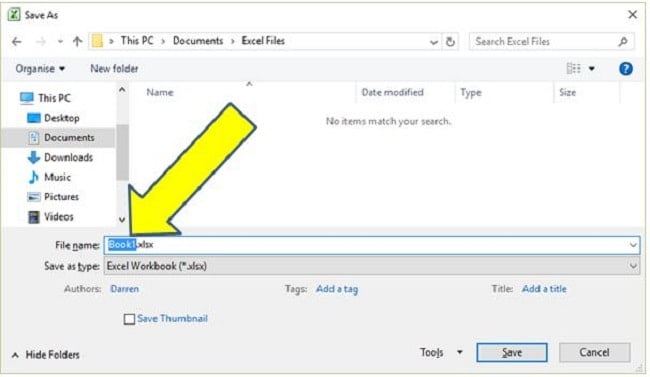
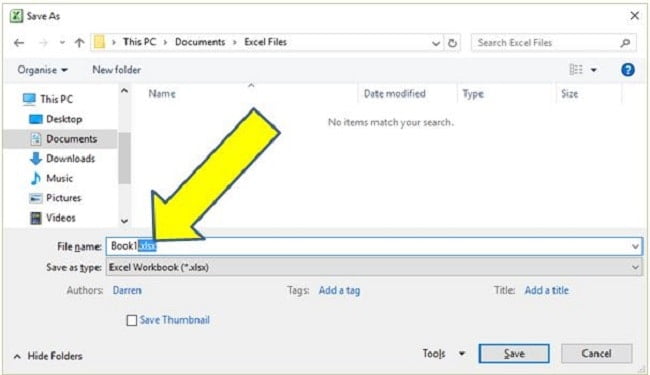
Note: The ‘.xlsx‘ part of the filename is defining what type of file it will be saved as, if you overwrite it by mistake it does not matter as Excel will still save the file as either the default version, which is ‘.xlsx’, or it will amend it when saving if we change the type.
File Types
The last part of the saving process is to ensure you are saving the file as the correct type.
As a beginner it will be rare to change from the default option of “Excel Workbook (*.xlsx)” but there is an array of options you can use and it is worth knowing a few of the key ones to ensure you stand out from the crowd.
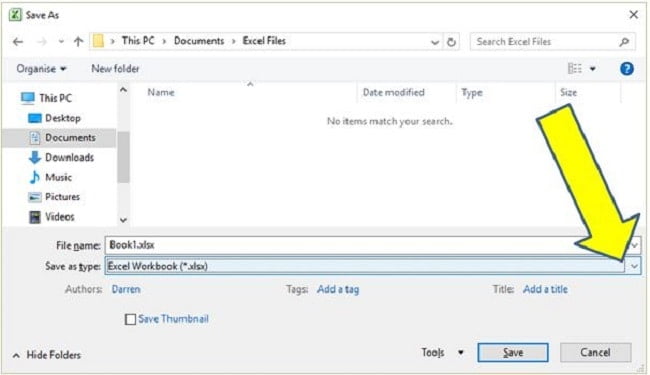
To change the File Type click on the “Save As Type” box below the filename:
The list of options will show up:
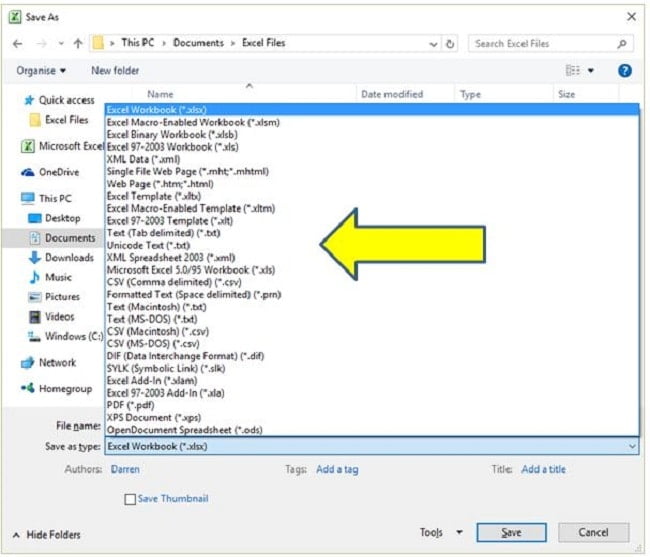
As you can see there are plenty of options. The majority are rarely used by most Excel users but they are useful to have in certain circumstances so it is wise to be aware of them.
The three most useful variants to know are:
- Excel Workbook (*.xlsx): This is the default Excel file type and one you will use for almost all your work. Many Excel users will never save their files as anything else.
- Excel Macro-Enabled Workbook (*.xlsm) : This is the file type when you have created a macro in the file. A macro is an automated script and hopefully something you will start to utilise when your Excel skillset improves and in order for them to function your Excel file will have to be saved in this type.
- Excel Binary Workbook (*.xlsb): This is a very useful file type and hugely overlooked by almost all Excel users, many have no idea what an XLSB file is! The XLSB format trims and condenses your Excel file to save space and that can be very useful if you have a large file that you want to email, in the business world the XLSB file type is the one I recommend for most occasions as it saves network space and speeds up email delivery.
Finishing Off – Save the Excel File
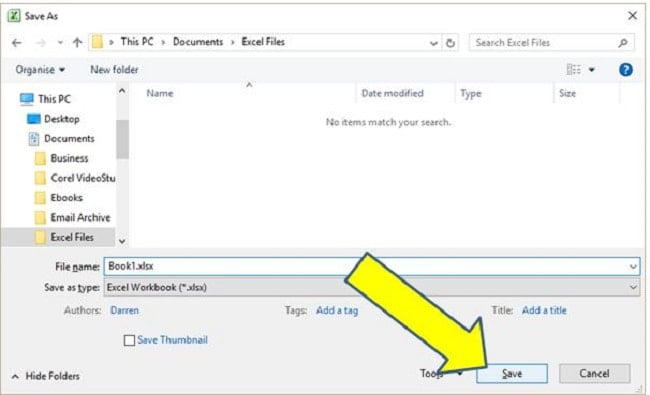
With everything selected you are ready to save the Excel file, to do so simply click on the Save Button:
Summary
Congratulations on reaching the end of this guide!
By now, you’ve mastered the essentials of saving files in Excel, a skill fundamental to your journey in data management.
Whether it’s choosing the right file name, selecting an appropriate file-path, or understanding the nuances between different file types like XLSX, XLSM, and XLSB, you’re equipped with knowledge that sets you apart from many beginners.
Remember, regular saving is key to protecting your hard work.
As you continue exploring Excel, keep applying these skills and watch how they simplify your workflow. Stay curious and keep excelling in your Excel journey!
Keep Excelling,

Now that you’ve learned how to save your Excel files like a pro, it’s time to make them shine on paper. Dive into our next guide, How to Print in Excel, where we unravel the essentials of printing your spreadsheets effectively. Whether it’s for a meeting, a report, or personal reference, we’ve got you covered.

