Mastering how to change the colour of Excel Worksheet tabs using a cell value is a powerful technique that can significantly enhance the functionality and user experience of your Excel workbooks. This technique, often overlooked by many Excel users, offers a subtle yet effective way to guide users through a workbook based on their interactions.
In this post, we’ll walk you through the steps to dynamically change worksheet tab colours based on cell values, simplifying navigation and making your Excel files more intuitive and interactive.
A Practical Scenario
Consider a scenario in a business environment, such as a questionnaire workbook. Employees complete questions on one worksheet, and their responses trigger a visual cue.
By learning how to change the colour of Excel Worksheet tabs using a cell value, you can subtly direct them to a relevant worksheet, whether it’s for further instructions, additional questions, or related guidelines.
This approach is less intrusive than automatically switching sheets and provides a user-friendly experience, enhancing the overall efficiency and effectiveness of the workbook.
Example
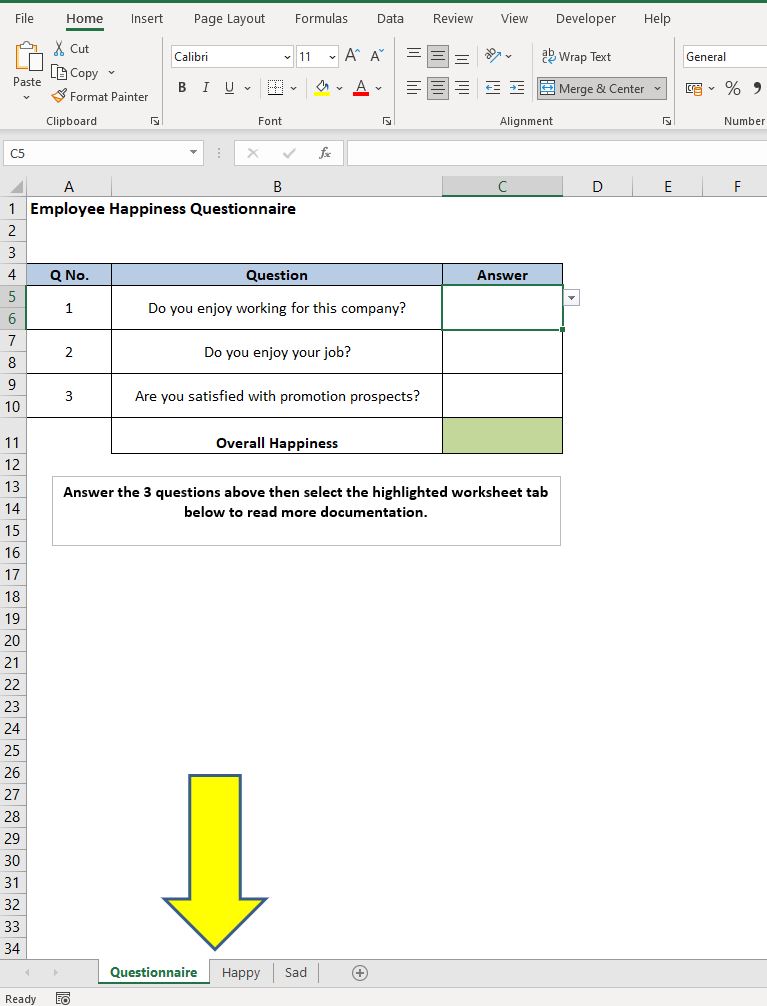
Below is an example Excel workbook, containing three worksheets:
- Questionnaire
- Happy
- Sad

The Questionnaire worksheet contains 3 questions for an employee to answer. Depending on the response to those questions a calculation will show the employees overall happiness, either “Happy” or “Sad” in cell C11.
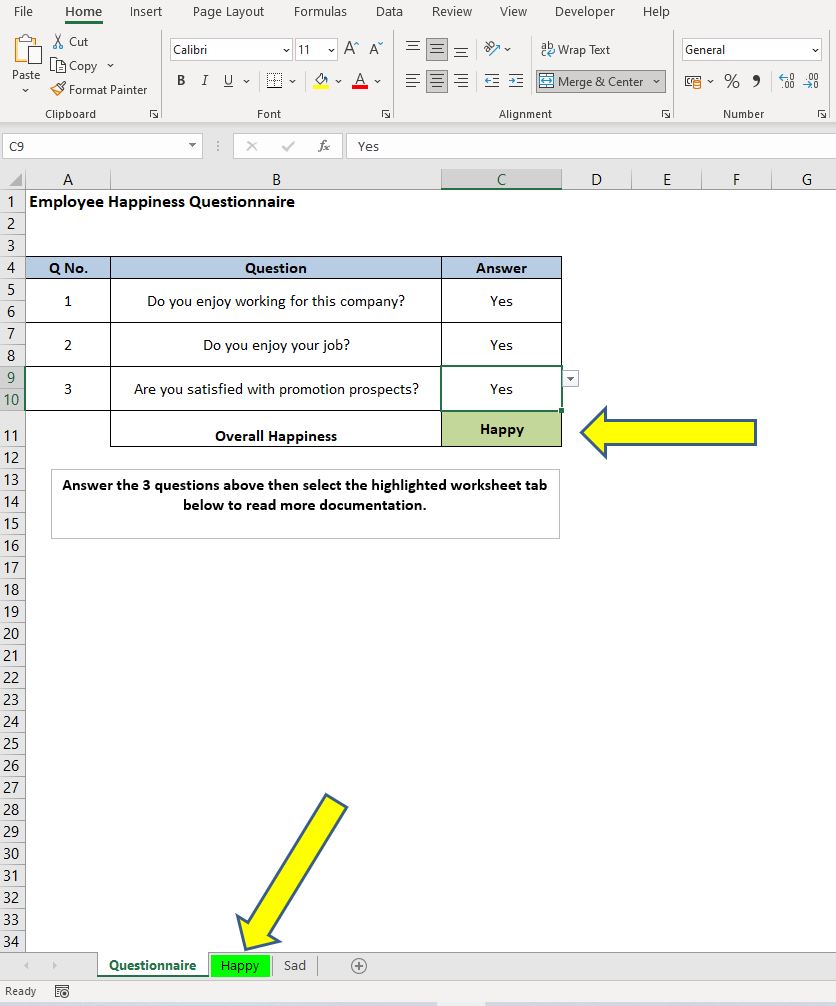
If the overall happiness result is “Happy” then we want to direct the employee to the “Happy” worksheet by changing the tab colour to Green.
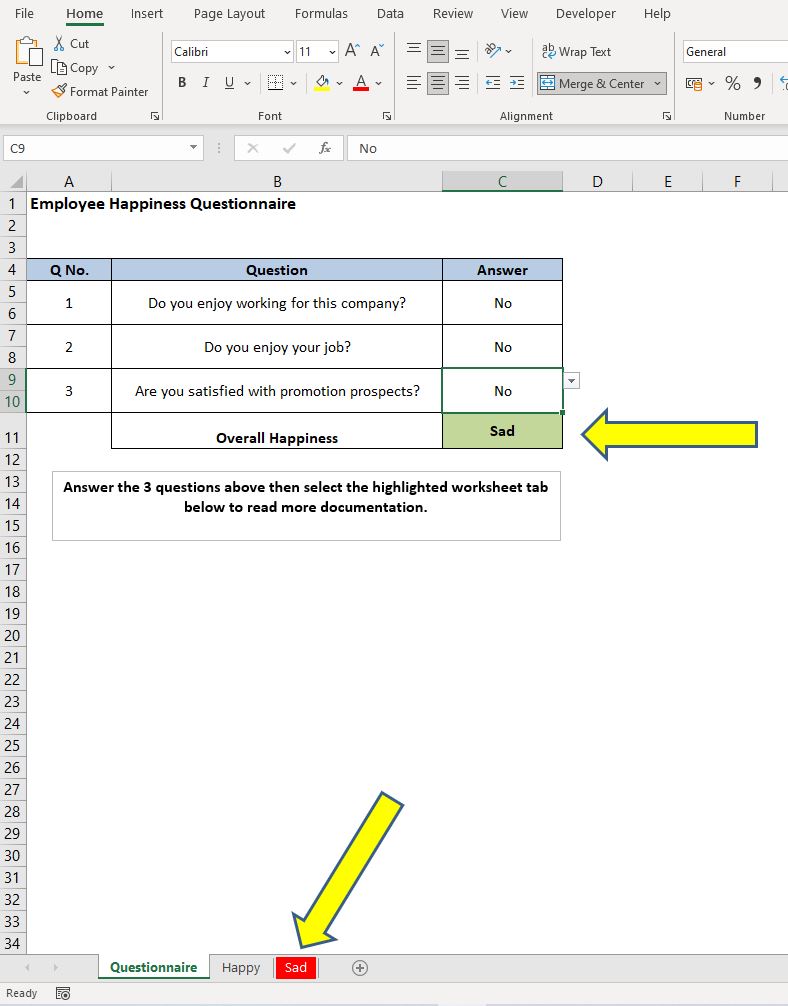
If the result is “Sad” we want to change the “Sad” worksheet tab colour to Red and direct them to that sheet (lets hope we don’t get too many of those!)
The value of overall happiness (in cell C11) will be used to determine which worksheet tab to change the colour of.
VBA Solution
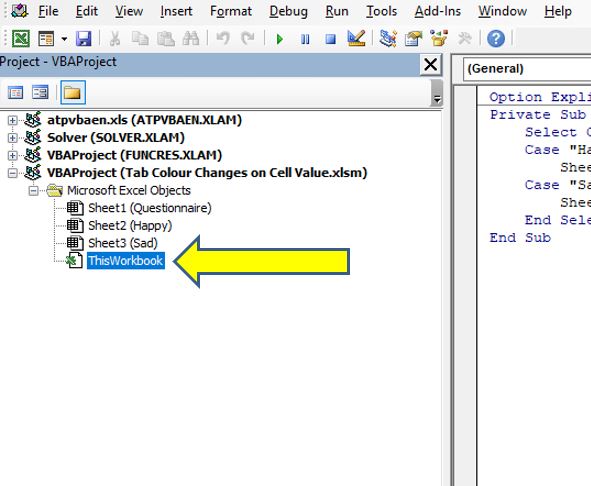
The initial step in dynamically changing the colour of Excel Worksheet tabs based on a cell value involves accessing Excel’s Visual Basic for Applications (VBA) environment. To do this swiftly, simply press ALT + F11. This shortcut key combination will open the Visual Basic window.
Once there, direct your attention to the VBA project window, typically found in the upper left-hand side of the screen.
Here, you’ll need to select ‘ThisWorkbook‘ in the coding area, setting the stage for the subsequent steps in implementing this Excel customisation.

The selection of the ‘ThisWorkbook‘ area in VBA is strategic, as our goal is to apply changes across the entire workbook. Unlike a module that targets specific tasks or sheets, this code will affect the workbook as a whole.
In our scenario, this means altering the tab colours of various worksheets based on responses from a ‘Questionnaire‘ sheet. Here’s how we implement this in VBA:
Option Explicit
Private Sub Workbook_SheetChange(ByVal Sh As Object, ByVal Target As Range)
    ' Evaluating the response in the Questionnaire
    Select Case Sheets("Questionnaire").Range("C11").Value
    Case "Happy"
        ' Changing the tab color for the "Happy" sheet
        Sheets("Happy").Tab.ColorIndex = 4
    Case "Sad"
        ' Changing the tab color for the "Sad" sheet
        Sheets("Sad").Tab.ColorIndex = 3
    End Select
End Sub
Understanding the VBA code
In our journey to change the colour of Excel Worksheet tabs using a cell value, we start with ‘Option Explicit‘. This command is crucial for beginners in Excel VBA, as it requires you to declare all variables. This practice helps avoid errors, ensuring your code is clean and accurate.
The Private Sub Workbook_SheetChange line initializes a private subroutine, specific to this workbook. It’s programmed to react when changes occur on a worksheet. For our purpose, it’s activated when a user’s response in cell C11 of the ‘Questionnaire‘ sheet triggers the code.
Within this subroutine, we use a Select Case statement. This works similarly to an ‘IF’ statement but is more efficient when dealing with multiple conditions. It monitors the value in ‘C11‘. When ‘C11‘ reflects “Happy“, the tab colour of the ‘Happy‘ sheet changes to the colour corresponding to ColorIndex = 4. Similarly, if ‘C11‘ says “Sad“, the ‘Sad‘ sheet’s tab colour changes per ColorIndex = 3.
We’ll explore colour indexes further, but it’s important to note that these numbers represent specific colours in Excel. The subroutine concludes with ‘End Select‘, and the entire block of code wraps up with ‘End Sub‘, signalling the end of this VBA operation.
The Result
The end result can be seen below. First off a nice positive employee who has answered Yes to all the questions, therefore returning a Happy result in cell C11 will see the Happy Worksheet tab highlighted in Green:

And life wouldn’t be life without the odd unhappy person so this shows the result where our employee is sad:

Understanding Colour Indexes in Excel
In the process of learning how to change the colour of Excel Worksheet tabs using a cell value, it’s important to grasp the concept of Colour Indexes. Unlike human language, Excel doesn’t interpret colour names like ‘Green’.
Given the myriad shades of each colour, using text for colour specification would be impractical. Instead, Excel employs Colour Indexes — numerical representations of colours. Each number in the Colour Index corresponds to a specific colour.
This system simplifies colour selection in Excel VBA. For beginners, a full list of these indexes is readily accessible through a simple Google search or directly on the Microsoft website, providing an easy reference to integrate various colours into your Excel projects.
Summary
In conclusion, this post has equipped you with the knowledge to change the colour of Excel Worksheet tabs using a cell value.
From understanding the basics of VBA coding to navigating Colour Indexes in Excel, we’ve covered the essential steps to dynamically alter worksheet appearances based on cell data. This skill not only adds visual appeal to your workbooks but also enhances functionality, making navigation intuitive for users.
Whether you’re a beginner or looking to expand your Excel capabilities, mastering this technique marks a significant step in your journey with Excel.
Keep Excelling,

Enhance your VBA-based Excel projects by ensuring their integrity. Discover how to prevent users from changing worksheet names with VBA – an essential step for secure, tamper-proof workbooks.

