This post explains how to Add Time Values in Excel. This is useful for various forms of project management within Excel, such as creating project timeline plans, or even developing staff rotas and time management systems for small businesses.
Introduction
Adding time values in Excel is essential in diverse business contexts. From multinational companies using Excel for project management and timelines to small businesses calculating job completion times, understanding how to add time values in Excel effectively is crucial for accurate planning and efficiency.
Calculating the Difference Between Two Times
To calculate the difference between two time periods in Excel the standard formula is:
- Difference = Latest Time Value – Earliest Time Value
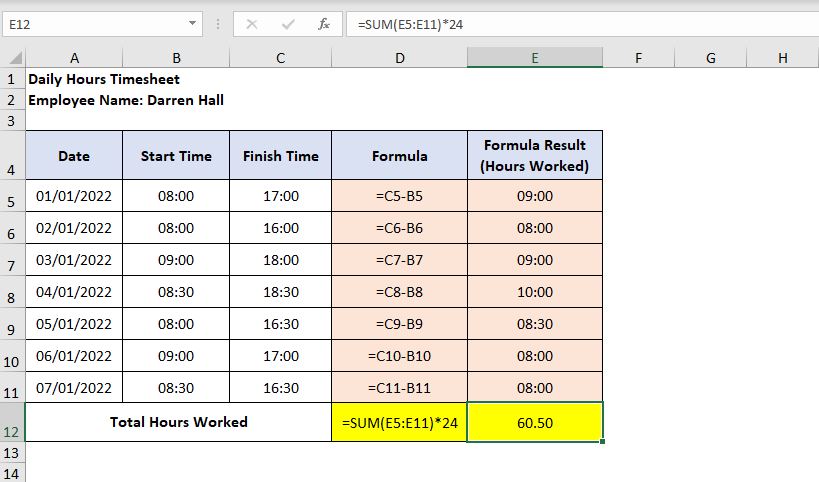
In the following sample Excel workbook there are daily hours worked for a week. To calculate the number of hours worked each day the formula in Excel is to take the finish time (values in column C) and subtract the start time (values in column B):
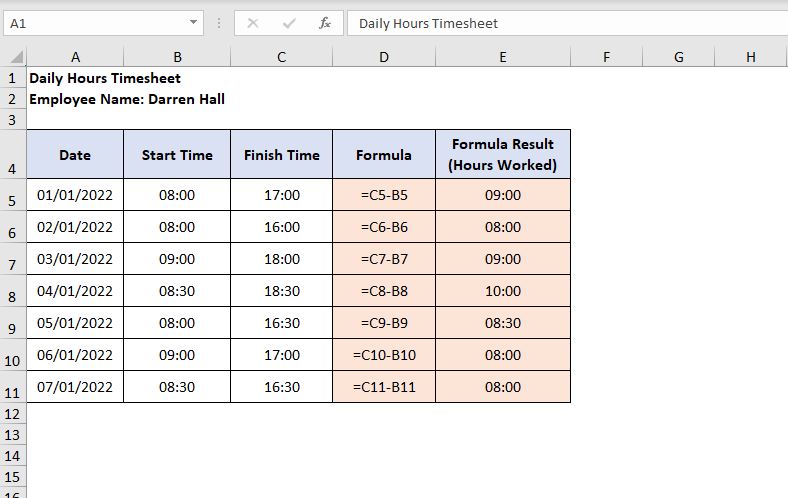
Adding Time Values in Excel
Using the previous example of hours worked per day it is now possible to find out how many hours have been worked that week. This is the part that usually catches most Excel developers out as it’s not as straight-forward as most people assume.
If we just choose to sum the daily hours (shown in column E) the result is not right:
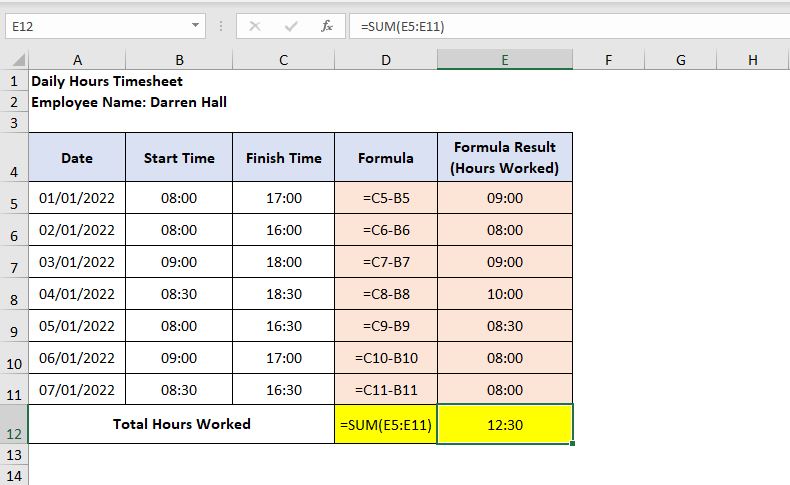
The total hours worked shows as 12 hours and 30 minutes, clearly not right as 17 hours were worked in the first two days alone! What is going on?
Excel interprets the values in column E as time values, which is correct if you look at the image. The problem with this is that Excel works on a 24 hour clock for time values therefore when you sum the time values it resets back to 00:00 as soon as it counts past 23 hours and 59 minutes.
Resolve the Time Addition Issue in Excel
To resolve the problem there are a couple of easy steps. First off the format of the cell has to be changed from a time value to a number. This is changed by selecting the cell to convert (in this example cell E12), right click and select Format Cells from the option box that appears:

Then change the value to Number in the left side Category section and click OK:
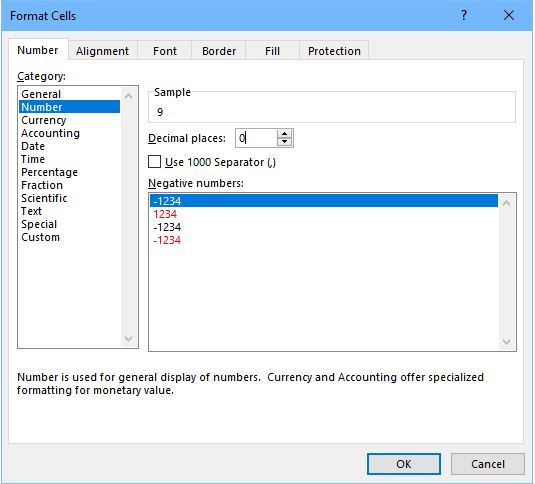
The result is the worksheet will now display the total time as a number. This is the first step because again the output is not the exact one desired, the value (in this example) shows 2.52 which equates to 2.52 days total and the desired result is the number of hours worked, not days.
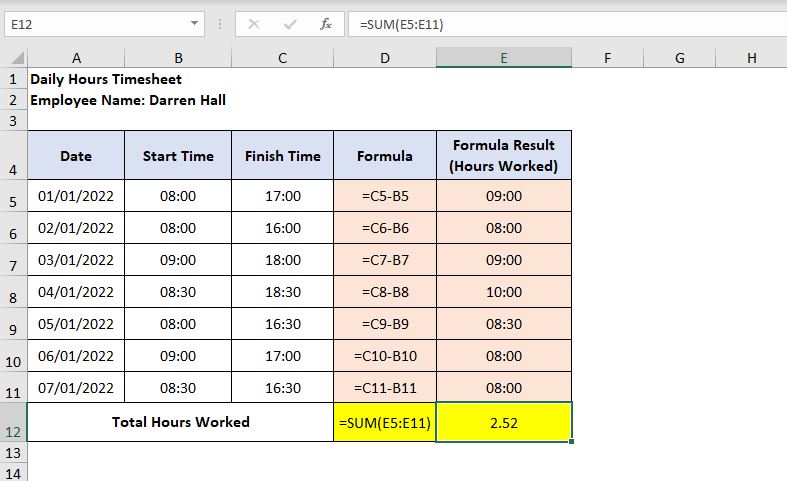
The final step is to amend the original SUM formula. As mentioned previously Excel works on a 24 hour clock so to convert the number of days into the number of hours you multiply the output by 24. Now cell E12 shows the correct result, 60.50 hours worked.
Summary
This guide has equipped you with key strategies to add time values in Excel. We’ve covered the essentials of using simple addition, the SUM function, and dealing with time formats exceeding 24 hours.
Remember, formatting and understanding Excel’s time calculations are critical for accuracy in your data projects. Apply these methods to streamline your time management tasks in Excel.
Next Step in Excel Mastery: Tidy Up Your Spreadsheets!
Just as you’ve learned to adeptly add time values in Excel, why not take another step towards Excel efficiency? Discover how to clean up your worksheets by removing blank rows. Check out our guide on How to Remove Blank Rows in Excel for easy-to-follow steps that will transform your data organization skills. Keep your spreadsheets sleek and functional with these expert tips!


