Unleashing the full capabilities of Microsoft Excel often involves delving into the world of Visual Basic for Applications (VBA). In this post, we’ll explore a fundamental yet powerful VBA task that every Excel developer should master: how to use VBA to copy a range to another sheet.
This essential skill is a cornerstone in efficient data management and report automation within Excel.
Table of Contents
- Introduction
- Example: Preparing Your Data
- Entering the World of VBA
- Crafting the VBA Code
- Tips for Copying Ranges with VBA
- Conclusion
Introduction
When it comes to Excel VBA scripting, one of the most frequent and essential tasks is using VBA to copy a range to another sheet. This functionality is pivotal in a multitude of scenarios, such as automating reports where you need to transfer imported data from one worksheet to another.
Whether it’s for compiling data, restructuring reports, or consolidating information, understanding how to adeptly copy data between sheets using VBA is a vital skill that enhances your ability to create dynamic and responsive Excel solutions.
Example: Preparing Your Data for VBA Copy
Before diving into the VBA script, it’s crucial to define the specifics of your data transfer task. This involves making some key decisions:
- Identify the Range to Copy: Determine the exact cells you need to copy. For instance, you might need to copy cells from A1 to B20.
- Source Worksheet Name: Identify the name of the worksheet containing your data range. This could be something like “ImportSheet” or “Sheet2“.
- Destination Worksheet: Decide where you want to paste the copied data. This will be your target worksheet.
- Destination Cell Start Point: Pinpoint the starting cell in the destination worksheet where your data will be pasted, like cell A1.
Ensuring consistency in your data location is vital. The data to be copied should always be in the same worksheet and range for the VBA script to work correctly.
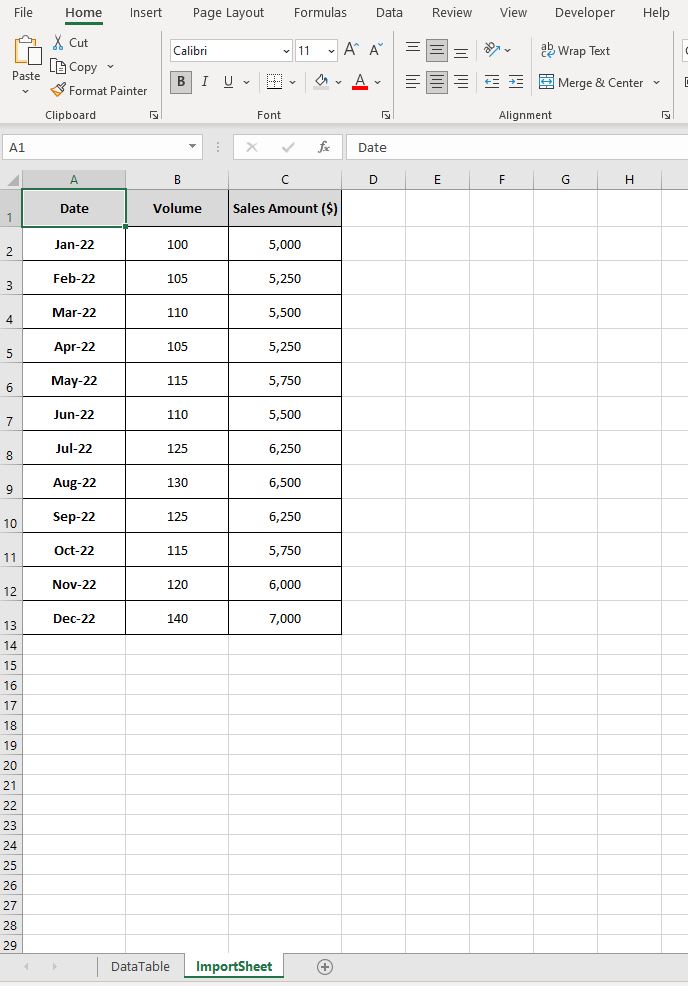
For this example, let’s assume the following setup:
- The range to be copied is from A1 to C13.
- The source worksheet is named “ImportSheet“.
- The data will be copied to a worksheet named “DataTable“.
- The copied data will start from cell A1 on the worksheet named “DataTable“.
By clearly defining these parameters, you set the stage for a smooth and error-free data transfer using VBA.
Entering the World of VBA
Now, it’s time to delve into the VBA environment.
To begin writing your script, open the VBA window in Excel. You can do this by selecting the Developer tab from the Excel ribbon and clicking on the Visual Basic icon. Alternatively, the shortcut ALT + F11 is a quick way to access the VBA window.

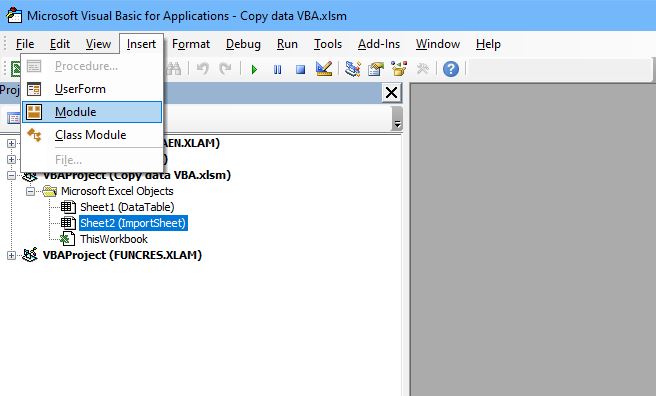
Once the VBA window is open, your next move is to insert a new module – the canvas for your VBA script. Simply click on Insert > Module from the top menu.
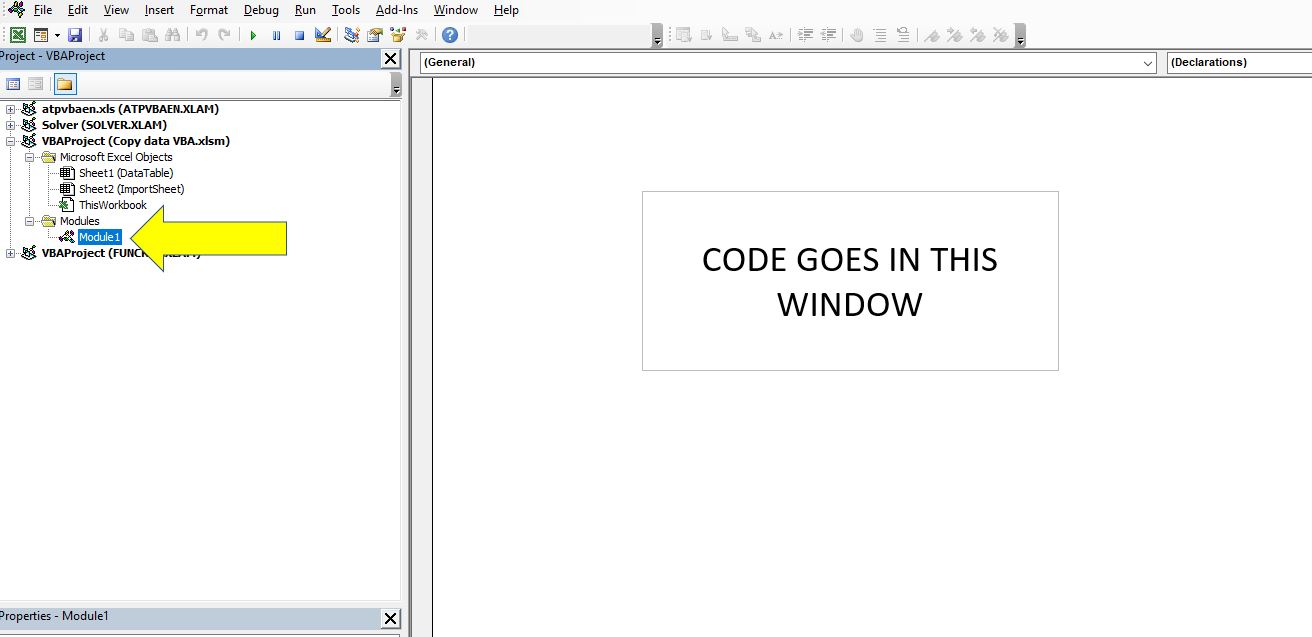
A new code window, typically named ‘Module1‘, will appear. This is where you’ll write the VBA code to use VBA to copy a range to another sheet.
Check out our Beginners Guide to the Excel Visual Basic Editor if you want to learn even more before progressing.
Crafting the VBA Code
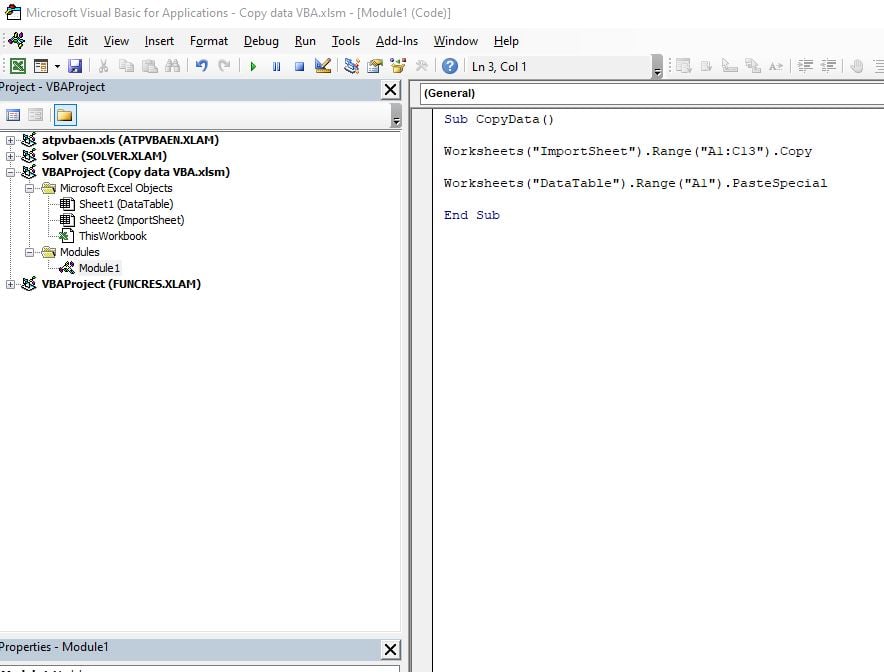
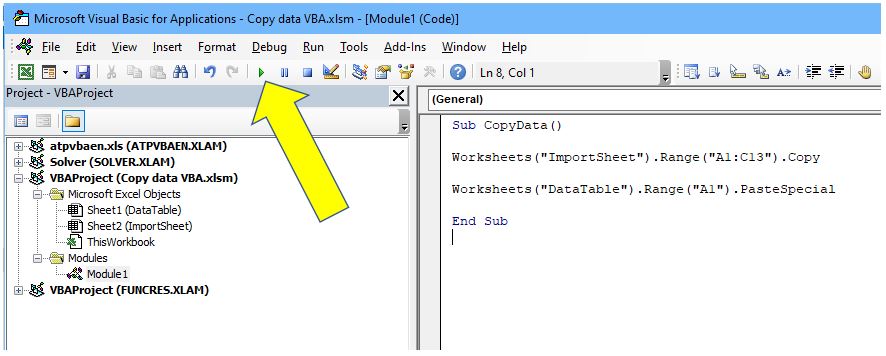
The essence of this task lies in the VBA code itself. Here’s the code to transfer data from ‘ImportSheet‘ to ‘DataTable‘:
Sub CopyData()
    Worksheets("ImportSheet").Range("A1:C13").Copy
    Worksheets("DataTable").Range("A1").PasteSpecial
End Sub
Breaking down the code:
- Sub CopyData(): This line initiates a sub-procedure named ‘CopyData‘. You can rename it as per your requirement. Remember, the parentheses are essential.
- Worksheets(“ImportSheet”).Range(“A1:C13”).Copy: This line specifies the data to be copied – from ‘ImportSheet’, range A1 to C13.
- Worksheets(“DataTable”).Range(“A1”).PasteSpecial: Here, the script dictates the destination – ‘DataTable‘ worksheet, starting at cell A1.
- End Sub: This line concludes the sub-procedure.
To execute the code, simply click the play button in the VBA window or press F5.
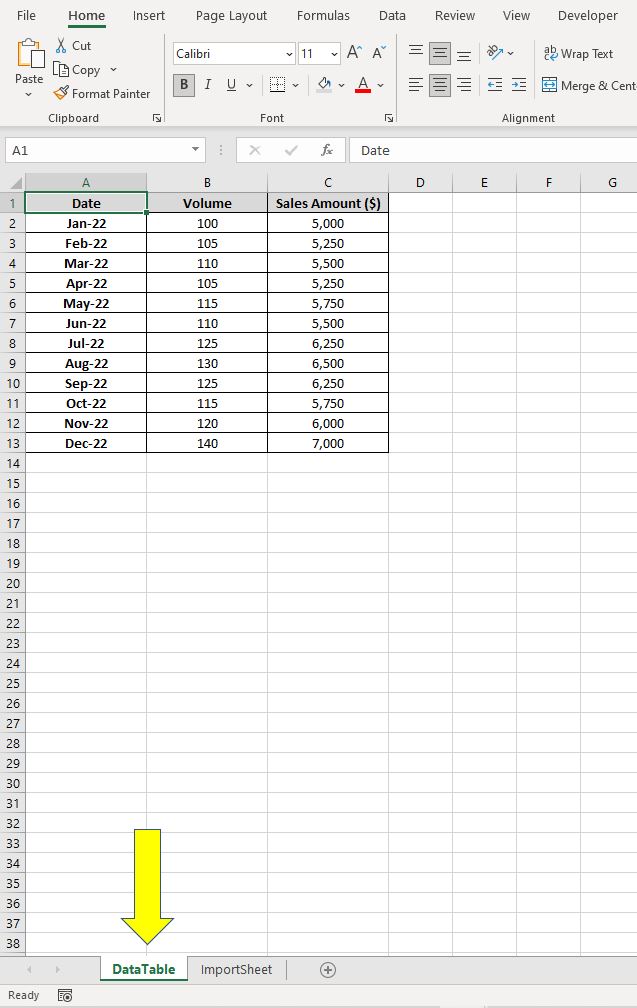
Following these steps, you will have successfully copied data from ‘ImportSheet‘ to ‘DataTable‘.
Tips for Copying a Range Using VBA
When using VBA to copy a range to another sheet, it’s important to follow best practices for optimal results. Here are some useful tips:
- Check Range Accuracy: Before executing the VBA script, verify that the range you’ve specified accurately encompasses the data you intend to copy.
- Avoid Overwriting Data: Ensure that the destination range is empty or that you’re aware of any existing data that might be overwritten.
- Use Named Ranges: For ease of understanding and maintaining your VBA code, consider using named ranges in your worksheets.
- Error Handling: Incorporate error handling in your VBA script to manage situations where the specified range or sheets do not exist.
These tips are designed to enhance your experience when you use VBA to copy a range to another sheet, ensuring efficiency and accuracy.
Conclusion
In conclusion, the ability to use VBA to copy a range to another sheet is a powerful tool in the arsenal of any Excel user.
This guide has walked you through the necessary steps to accomplish this task, accompanied by valuable tips to refine the process. Whether you’re consolidating data for reports, organizing large datasets, or automating repetitive tasks, this VBA skill significantly boosts your productivity and efficiency in Excel.
With these insights and techniques, you’re now well-equipped to handle a variety of data management tasks in Excel with greater confidence and ease. As you continue to explore the possibilities of VBA, remember that each new skill you acquire not only simplifies your workflow but also opens the door to more advanced Excel functionalities.
Keep Excelling,

Ready to Level Up Your VBA Skills?
Now that you’ve mastered how to use VBA to copy a range to another sheet, let’s take your VBA expertise further! Our next article, “5 Simple VBA Tips for Excel,” is perfect for enhancing your scripting skills. From optimizing your code to exploring handy shortcuts, these tips are designed to make your VBA journey smoother and more efficient. Dive into these essential VBA insights here!

