
Picture this: You’re working on an Excel report and find yourself caught in a cycle of repeating actions. It’s both tedious and time-consuming, right? Now, imagine if there was a way to automate these tasks, enhancing your efficiency and speeding up your workflow. This is where the concept of Looping in Excel becomes a game-changer.
In today’s guide, I will take you through the essentials of using Loop in Excel VBA. We will start from the basic principles and gradually move to more sophisticated applications. Prepare to discover how using Loop in Excel can revolutionize your approach to Excel tasks, turning repetitive work into an automated, efficient process.
Table of Contents
- What Are Loops in Excel VBA?
- Why Use Loops in Excel VBA?
- For Next Loop
- Do While Loop
- For Each Loop
- How to Choose the Right Loop in Excel
- Advanced Use Cases for Looping in Excel
- Summary
What Are Loops in Excel VBA?
Loops in Excel VBA are fundamental programming structures that allow you to repeat actions a set number of times or until a certain condition is met.
Think of a loop like a record player, repeating the same track until you decide to stop it. In Excel VBA, loops can iterate through ranges, arrays, or even whole worksheets, performing actions on each element they encounter.

Why Use Loops in Excel VBA?
Using loops in Excel VBA is a game-changer for anyone looking to enhance their productivity. Here are some scenarios where loops can be incredibly useful:
- Data Entry and Formatting: Imagine you need to format thousands of rows in a specific way. A loop can automate this, applying the formatting across all rows in a blink of an eye.
- Data Analysis: Need to perform the same calculations on numerous data sets? Loops can automate these calculations, ensuring accuracy and efficiency.
- Automating Repetitive Tasks: Whether it’s generating reports or cleaning data, loops handle repetitive tasks, freeing up your time for more complex analysis.
There are three main ways to do looping in Excel. The For Next Loop, the Do While Loop and the For Each Loop. We’ll explore each of these looping methods in more detail in the following sections.
For Next Loop
Our first stop is the For Next Loop. A perfect tool for beginners starting out with loops in Excel..
Think of the For Next Loop as the stepping stone into looping constructs: it’s simple, structured, and incredibly efficient for iterating over a set number of tasks.
Whether you’re manipulating data in rows, columns, or arrays, this loop provides a clear path for execution, repeating a block of code for a specified range. Its linear approach and ease of understanding make it an ideal starting point for anyone new to Looping in Excel.
Real-World Example of the For Next Loop
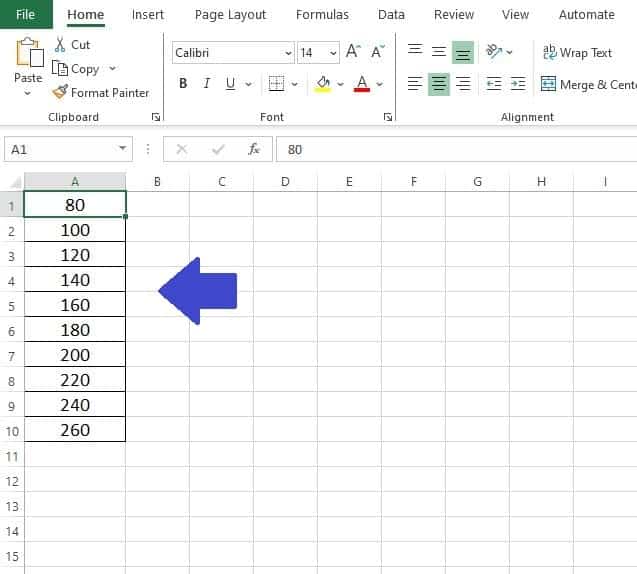
Imagine you’re working in a retail company and have a list of product prices in an Excel sheet.
Your task is to apply a 10% discount to each product and list the new prices. The For Next Loop is ideal here because you have a specific range of cells (the product prices), and you want to perform the same action (applying the discount) on each cell.
Let’s assume the product prices are listed in cells A1 to A10. These prices vary, and you need to reduce each by 10%.
VBA Code for For Next Loop
We need to create some VBA code to iterate through cells A1 to A10. Then, for each cell, multiply the current price by 0.9, effectively reducing it by 10%. Here’s the VBA Code:
Sub ApplyDiscount()
    Dim i As Integer
    For i = 1 To 10
        Cells(i, 1).Value = Cells(i, 1).Value * 0.9
    Next i
End Sub
This VBA macro is designed to reduce prices in an Excel sheet by 10%. Here’s a breakdown of each line of code:
- Sub ApplyDiscount(): This line begins the definition of the macro.
- Dim i As Integer: Declares a counter variable i as an integer.
- For i = 1 To 10: Starts a For Next Loop, which will run from i = 1 to i = 10.
- Cells(i, 1).Value = Cells(i, 1).Value * 0.9: This line adjusts the value in each cell in column A (from A1 to A10) to 90% of its original value, effectively applying a 10% discount.
- Next i: Moves to the next iteration in the loop until i reaches 10.
- End Sub: Marks the end of the macro.
- Key Points:
- Ensure that the range (in this case, A1 to A10) contains valid numerical data. Non-numeric values will result in errors.
- The loop counter i starts at 1 and ends at 10, corresponding to the rows of the data. Adjust these values if your data is in a different range.
- Remember that this action is irreversible. Once the prices are reduced, the original data cannot be retrieved unless you have a backup.
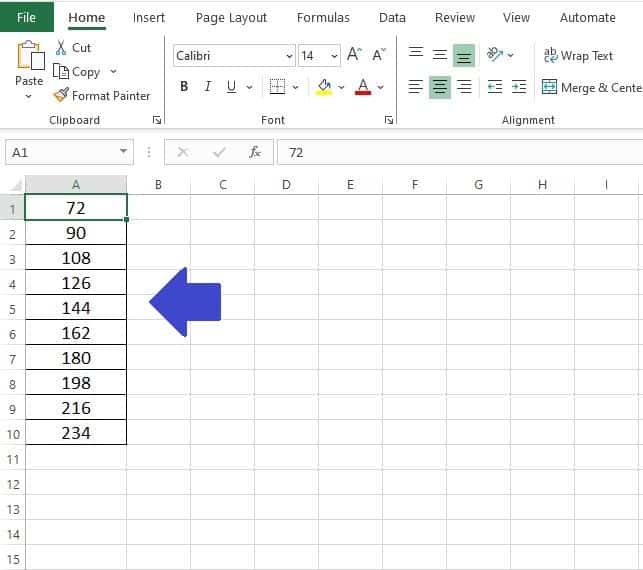
When run, this macro applies a 10% discount to the first 10 cells in column A (A1 to A10) using a simple For Next Loop.
Advantages and Disadvantages of the For Next Loop
The For Next Loop in Excel VBA offers several key advantages that make it a go-to choice for many programmers, especially beginners. These benefits include:
- Simplicity:
- This loop is straightforward to set up and use, making it perfect for scenarios with a known and fixed range. Its user-friendly nature helps beginners quickly understand and implement it in various Excel tasks.
- Control:
- Offering precise control over the range of cells it processes, the For Next Loop minimizes the risk of inadvertently altering data outside the specified range. This level of control is invaluable, particularly when handling sensitive or critical data.
Despite its advantages, the For Next Loop has certain limitations that are important to consider in more complex or dynamic Excel projects. These include:
- Inflexibility with Dynamic Ranges:
- When it comes to handling data that frequently changes in size, such as dynamically added or removed rows, the For Next Loop falls short in adaptability. Adjusting the loop’s range manually in the VBA code can become a repetitive and error-prone task.
- Efficiency Issues:
- The loop’s individual cell processing method can lead to inefficiencies, particularly when dealing with very large datasets. In these cases, alternative methods or advanced looping structures might offer more efficient solutions.
Do While Loop
Our next focus is the Do While Loop. This loop is a versatile and essential tool in Excel VBA for tasks where the ending condition isn’t known in advance.
Unlike the For Next Loop, the Do While Loop continues as long as a specified condition is true. This makes it particularly useful for handling varying amounts of data, or when your tasks need to adapt to changing conditions.
In scenarios where the number of data points isn’t predetermined or where conditions may vary, the Do While Loop offers a flexible and dynamic approach to looping in Excel.
Real-World Example of the Do While Loop
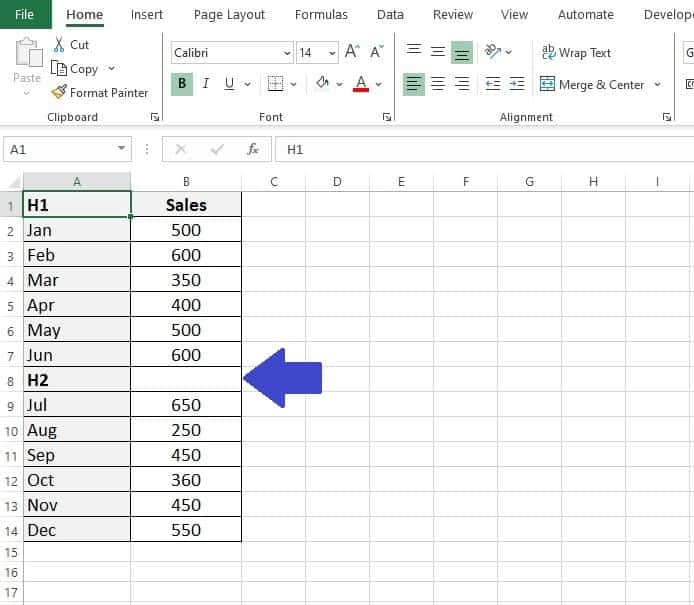
Let’s consider a situation where you’re tasked with scanning a column of data in Excel until you find a blank cell. In a sales report, for instance, you might need to sum up all values until you reach an undefined endpoint, such as the end of the current data entries.
Suppose your sales data starts from cell B1 downwards. You need to continuously sum these values until you encounter a blank cell, indicating the end of the data (in this case our blank cell is in B8).
VBA Code for Do While Loop
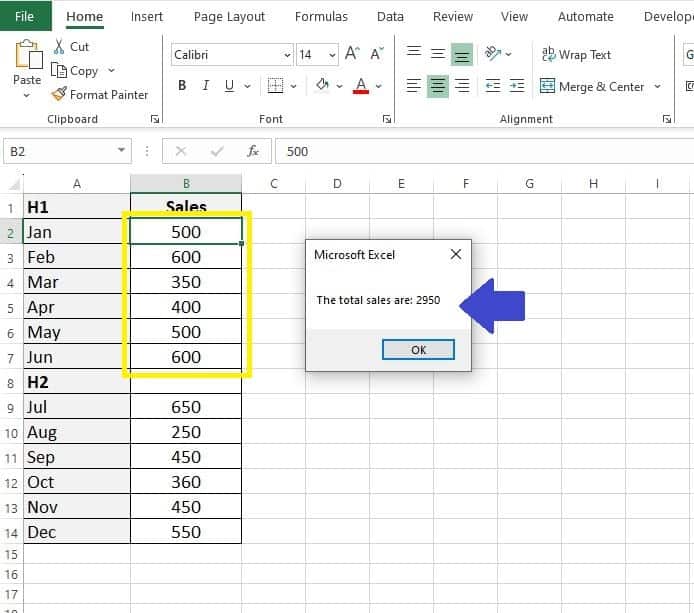
To handle this task, we’ll write a VBA code that sums the values in the cells starting from B2 (B1 contains a header) and continues down the column until it finds a blank cell.
We’ll add a message box to display the total, but we could just as easily output it to a cell on the spreadsheet.
Sub SumUntilBlank()
    Dim total As Double
    Dim i As Integer
    i = 2
    total = 0
    Do While Cells(i, 2).Value <> ""
        total = total + Cells(i, 2).Value
        i = i + 1
    Loop
    MsgBox "The total sales are: " & total
End Sub
This code initializes a total variable and uses the Do While Loop to continually add the value of each cell in column B2 down to this total.
The loop proceeds to the next cell down after each addition. When an empty cell is encountered, the loop stops, and the total sales are displayed.
- Key Points of the VBA Code:
- The loop begins at cell B2 (i = 2) and checks if the cell is non-empty.
- It adds the cell’s value to the cumulative ‘total‘.
- The loop increments to the next cell and repeats the process.
- Upon reaching an empty cell, the loop exits, and the total is displayed in a message box.
Advantages and Disadvantages of the Do While Loop
When it comes to the Do While Loop in Excel VBA, it’s essential to weigh both its strengths and limitations to fully harness its capabilities. This loop has specific scenarios where it shines, but also instances where caution is advised. Let’s look at some of the advantages of this looping method first:
- Flexibility:
- The standout feature of the Do While Loop is its flexibility. It’s incredibly effective in situations where the number of iterations is unknown or variable. This loop dynamically adapts to the data it processes, making it ideal for datasets that are not static or predefined.
- Condition-based Processing:
- Another significant advantage is its efficiency in condition-based operations. The loop continues executing as long as the defined condition holds true, making it perfect for tasks that require continuous assessment and action until a certain criterion is met.
In these respects, the Do While Loop offers a level of adaptability and responsiveness that is particularly useful in dynamic data processing scenarios. However, a couple of disadvantages to be aware of are:
- Risk of Infinite Loops:
- A major point of attention with the Do While Loop is the risk of creating infinite loops. If the loop’s exit condition is not properly established or if it’s never met, the loop can continue indefinitely. This calls for careful and thoughtful setting up of the loop’s conditions.
- Efficiency Concerns:
- In situations where you’re dealing with large datasets and the exit condition is infrequently met, the Do While Loop may not be the most time-efficient method. In such cases, exploring other looping constructs or techniques might yield better performance.
Understanding these advantages and disadvantages is crucial. The Do While Loop can be a powerful tool in your Excel VBA arsenal, especially when dealing with fluctuating or unpredictable data.
However, its effectiveness hinges on how well you tailor it to the specific requirements and constraints of your task.
For Each Loop
As we conclude our exploration of Excel VBA’s loop structures, we arrive at the For Each Loop – the last of the three pivotal loops we are examining. This loop stands out for its unique approach to handling collections of items, such as ranges or arrays, in Excel.
What distinctly separates the For Each Loop from its counterparts, the For Next Loop and the Do While Loop, is its inherent focus on objects within a collection.
Unlike the For Next Loop, which is designed for a predetermined number of iterations, and the Do While Loop, which continues based on a conditional test, the For Each Loop simplifies the process of iterating through each element in a collection.
The For Each Loop offers a more intuitive way to work through items in a collection, without the need for a counter or a conditional test. This makes it particularly advantageous for tasks like formatting a range of cells, where you need to perform an action on each element individually.
It streamlines the process, providing a clear and efficient path for operations on collections, which is distinctively different from the more linear approach of the For Next Loop and the condition-focused nature of the Do While Loop. In essence, the For Each Loop encapsulates the ease of use and directness, making it an essential tool for a variety of tasks in Excel VBA.
Real-World Example of the For Each Loop
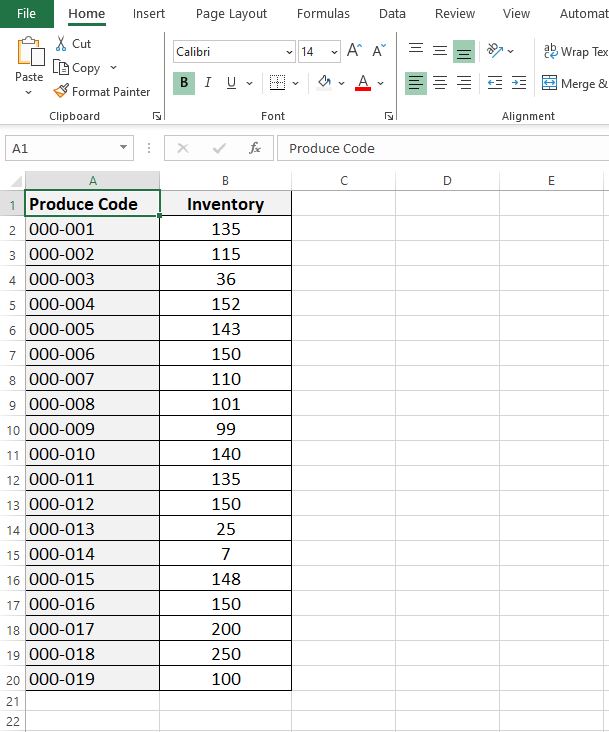
Imagine you’re tasked with a common Excel scenario: you have a list of different items in a column, and you need to format each cell based on specific criteria.
For instance, let’s say you want to highlight all cells with a value less than 100 in a product inventory list. The For Each Loop is perfectly suited for this task because it allows you to examine and modify each cell in the range one by one.
Let’s assume your product inventory quantities are listed in column B, from B2 to B20. You need to highlight cells where the inventory is less than 100 units.
VBA Code for the For Each Loop
To accomplish this task, we’ll write a VBA code that iterates through each cell in the specified range and applies formatting to cells meeting our criteria:
Sub HighlightHighInventory()
Dim cell As Range
For Each cell In Range("B2:B20")
If cell.Value < 100 Then
cell.Interior.Color = RGB(255, 255, 0) ' Yellow background
End If
Next cell
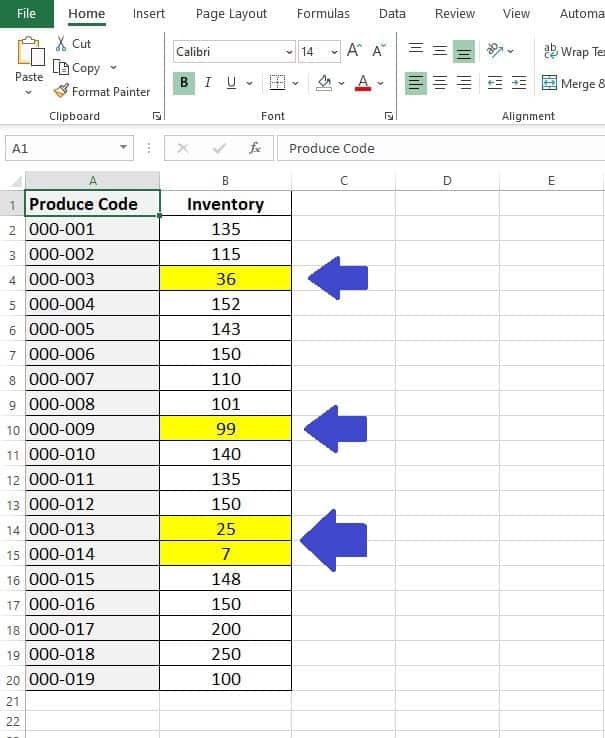
End SubThis code loops through each cell in the range B2 to B20. If a cell’s value is less than 100, it changes the cell’s background colour to yellow.
- Key Points of the VBA Code
- The For Each cell In Range(“B2:B20″) line initiates the loop, setting cell as the variable to represent each cell in the range.
- The If statement checks if the cell’s value is less than 100.
- When the condition is met, the cell’s background color is set to yellow using the .Interior.Color property.
- The loop then proceeds to the next cell until all cells in the range have been evaluated.
Advantages and Disadvantages of the For Each Loop
The For Each Loop in Excel VBA holds a unique position in the spectrum of looping constructs, particularly for its ease of use and efficiency in certain scenarios.
Understanding its advantages and potential pitfalls is key to utilizing it effectively in your Excel tasks. Let’s explore what advantages the For Each Loop has.
- Ease of Use:
- One of the most significant advantages of the For Each Loop is its simplicity and user-friendliness. It allows you to iterate through each element in a collection, such as a range of cells or an array, without the need for a counter. This makes your code cleaner and easier to read.
- Automatic Range Handling:
- The For Each Loop automatically handles the range of the collection it iterates over. This means you don’t need to specify the start and end points, which is particularly useful when dealing with ranges or collections where the size might not be known upfront.
On the flip side, there are a couple of disadvantages to be aware of when using the For Each Loop.
- Limited Control Over Order:
- While the For Each Loop is excellent for going through items in a collection, it doesn’t allow you to control the order of iteration. This can be a drawback when the order of processing is crucial.
- Not Suitable for All Tasks:
- The For Each Loop is designed for specific types of collections and tasks. It may not be the best choice for operations that require more complex control structures or when working with non-collection data types.
How to Choose the Right Loop
Selecting the appropriate loop in Excel VBA is crucial for efficient and effective coding. Understanding the differences between the For Next Loop, the Do While Loop, and the For Each Loop will empower you to choose the right tool for your specific task.
Let’s break down the scenarios where each loop excels, helping you make an informed decision.
For Next Loop
- Use When: You have a predefined number of iterations. This loop is your go-to when you know in advance how many times you need to repeat a block of code.
- Ideal for: Tasks like repeating a calculation a certain number of times or iterating through a fixed range of cells.
Do While Loop
- Use When: Your loop needs to continue until a specific condition is met, and you’re not sure how many times the loop will need to run.
- Ideal for: Situations where you’re processing data until a certain condition changes, such as reading a list until you encounter a blank cell or a specific value.
For Each Loop
- Use When: You need to perform an action on each element in a collection, like a range of cells, and the order of processing is not a concern.
- Ideal for: Tasks that require you to go through each item in a collection, such as applying formatting to a range of cells or processing elements in an array.
When deciding which loop to use, consider these key factors: the nature of your task, whether your iteration count is known or unknown, and if you’re dealing with collections of items.
By matching the characteristics of your task with the strengths of each loop type, you’ll be able to write more efficient and effective VBA code. This understanding is a foundational skill in Excel VBA programming and will greatly enhance your ability to handle a variety of data processing tasks.
Advanced Use Cases for Looping in Excel
As you grow more comfortable with the basics of loops in Excel VBA, you’ll find that they can be adapted for more complex and sophisticated tasks. These advanced applications not only enhance the capabilities of your Excel projects but also streamline processes that would otherwise be incredibly time-consuming.
Let’s delve into some of these advanced use cases:
Nested Loops
- When to Use: Nested loops are particularly useful when you’re dealing with multi-dimensional data, like tables or grids.
- Application: Imagine you’re working with a table where you need to compare each cell’s value with others. You could use one loop to iterate through rows and another within it to go through columns.
Loop with Conditions
- When to Use: This approach is ideal for tasks that require complex decision-making processes.
- Application: Consider a scenario where you need to process a list of items, but only under certain conditions. By integrating If…Then statements within your loop, you can selectively process data that meets your criteria, like filtering out specific values or applying conditions to formatting.
Dynamic Ranges
- When to Use: Dynamic range handling is essential in situations where the size of the data range is not fixed and can change, such as data that’s regularly updated or expanded.
- Application: You could use loops to automatically adjust to the size of the data. For example, if you’re summing values in a column that receives new entries periodically, your loop can adapt to include these new entries without manual code adjustments.
Combining Loop Types
- When to Use: Sometimes, the best solution involves combining different types of loops.
- Application: You might use a For Each Loop to go through a collection and within it, a For Next or Do While Loop to perform operations on sub-elements of each item in the collection.
By exploring these advanced applications of loops in Excel VBA, you unlock a higher level of automation and efficiency. These techniques not only save time but also reduce the likelihood of errors in repetitive tasks, making your Excel projects more robust and reliable.
As you become more adept at implementing these advanced looping strategies, you’ll find that your ability to handle complex data manipulation tasks in Excel becomes significantly more powerful and effective.
Summary
This has been a comprehensive guide on how to use Loop in Excel VBA.
Mastering loop structures in Excel VBA opens up a world of possibilities. By automating repetitive tasks, you not only save time but also minimize errors, making your work more efficient and reliable.
From simple data entry to complex nested loops, the potential applications are vast and varied. Embrace the power of loops, and you’ll find yourself transforming the way you work with Excel.
Remember, the key to success with Excel VBA is practice and experimentation, so don’t hesitate to try out these techniques in your projects.
Keep Excelling,

Curious about unlocking more Excel secrets? Discover ‘How to Create a Pareto Chart in Excel‘ next! Even if you’re not familiar with Pareto Charts, this easy-to-follow guide will turn you into an expert in no time. Dive into this powerful tool for data analysis and enhance your Excel skills today!