
Are you struggling with cluttered and mismatched Excel columns? Excel columns autofit is your game-changer. Say goodbye to the endless drag-and-drop routine of resizing.
This simple, yet powerful feature not only streamlines your data presentation but also transforms the way your spreadsheets look and function.
Dive in to discover how you can effortlessly achieve polished, perfectly sized columns every time.
Table of Contents
Introduction
Mastering the art of Excel columns autofit is not just about aesthetics; it’s a crucial step in making your data readable, accessible, and professionally presented.
When your data spills over its designated space, it either gets cut off or invades neighbouring cells, resulting in a spreadsheet that’s both cluttered and confusing.
While manually adjusting column widths is a common practice in Excel, this approach becomes cumbersome, especially when dealing with dynamic or voluminous data sets.
The key to effortlessly managing this is by leveraging Excel’s VBA – a powerful programming environment that can significantly elevate your Excel usage.
By applying some straightforward VBA tweaks, your columns can automatically adjust or ‘autofit’ to the length of your content.
And don’t worry if you’re new to VBA.
I’ll guide you through every step of incorporating VBA into your Excel file, complete with all the necessary code, to ensure your columns autofit seamlessly with your data.
Column Autofit: Your Excel Advantage
Learning how to auto-adjust column widths using VBA offers several advantages:
- Increased Productivity: Automating column width adjustments saves you a significant amount of time, especially if you frequently work with data that changes or expands.
- Consistent Presentation: Automated column width adjustment ensures that your data is always displayed correctly, enhancing the professional appearance of your spreadsheets.
- Enhanced Excel Skills: Learning to use VBA scripts will boost your Excel proficiency, opening doors to more advanced data management techniques.
- Customization and Flexibility: With VBA, you can tailor the script to suit your specific needs, offering you control over how your data is displayed.
How to Make Excel Columns Autofit
Let’s jump right in and show you how to make your Excel columns autofit, this effectively automatically adjusts the column width to your data as you enter it into the worksheet.
Step 1: Accessing the VBA Editor
First, let’s open the VBA Editor. Press Alt + F11 in Excel. This shortcut brings up the VBA Editor where you can write and edit macros.
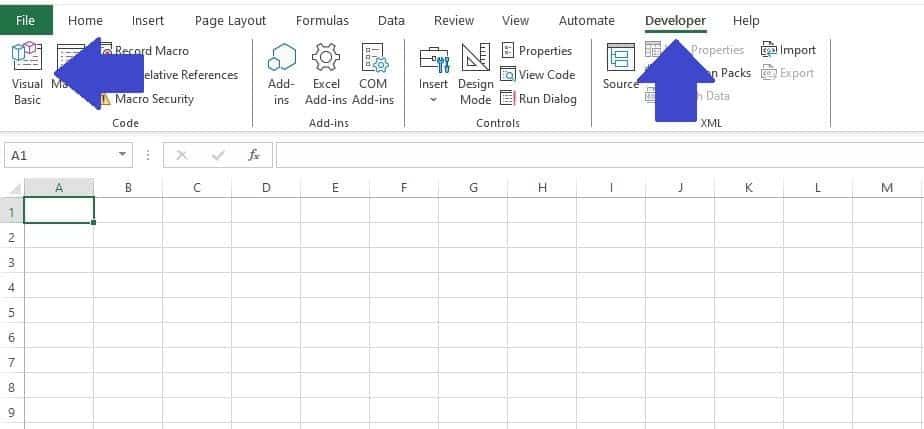
There are other ways to access the VBA Editor, such as by selecting the ‘Developer‘ menu from the Excel Ribbon and then clicking on the ‘Visual Basic‘ icon.
Note: If you don’t see the Developer tab in your Excel Ribbon you can learn How to Add Developer Tab to Excel with this guide.
Step 2: Identify the Worksheet
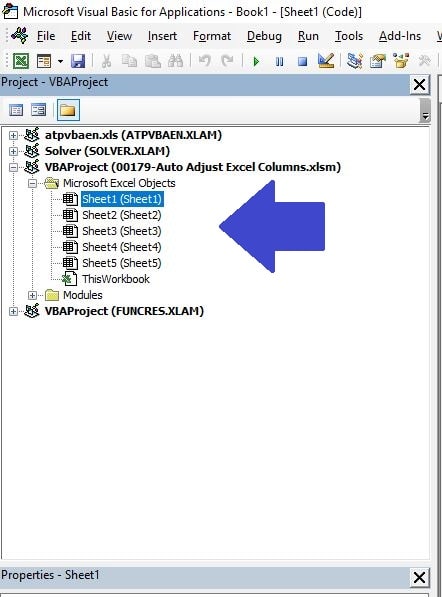
In the Visual Basic Editor select the worksheet where you want to apply the column autofit VBA code.
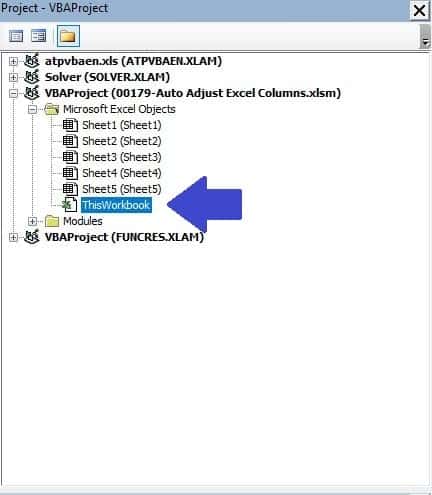
This is achieved by selecting the worksheet in the ‘Project Explorer‘ section (as shown in the below image).
If for some reason you can’t see the Project Explorer window when you open the Visual Basic Editor you can bring it to view by selecting ‘View‘ > ‘Project Explorer‘ on the top menu bar.
Why the Worksheet-Specific Area?
- Event-Driven Nature: We are going to apply something called a “Worksheet Change Event“.
These events are triggered whenever a change is made to the cells in a particular worksheet. For example after data is entered in a cell. - Targeting Specific Sheets: Placing the code in a worksheet-specific area allows you to target the specific sheet where you want the auto-adjustment of column widths to occur.
If you have multiple sheets and want this feature in all of them, you’d need to copy the code into each sheet’s code area.
Step 3: Writing the Auto-Adjust Column Width Macro
The third step is to write the VBA code to that will make Excel columns autofit your data, or automatically adjust the column widths of the Excel worksheet.
There is no need for you to write the code, I have done this for you.
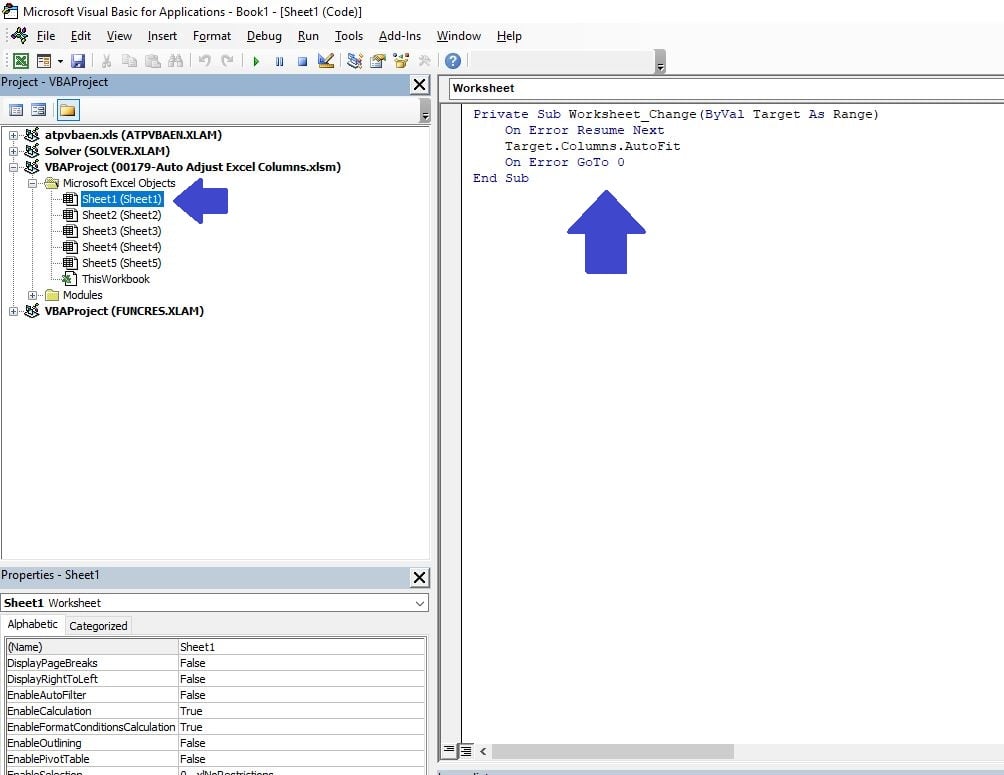
All you need to do is copy the below VBA script and paste it into the code window on your Visual Basic editor:
Private Sub Worksheet_Change(ByVal Target As Range)
    On Error Resume Next
    Target.Columns.AutoFit
    On Error GoTo 0
End Sub
Step 4: Saving Your File as a Macro-Enabled Workbook
Finally you must save your file as a macro-enabled workbook (‘.xlsm‘).
Saving as a macro-enabled file (‘.xlsm‘) will not impact any other functionality but it is required.
This is because the VBA code is stored within the workbook, and regular Excel workbook formats (such as ‘.xlsx‘) do not support embedded macros.
When opened in the ‘.xlsx‘ format, the macro will not be present or run so this is a critical step.
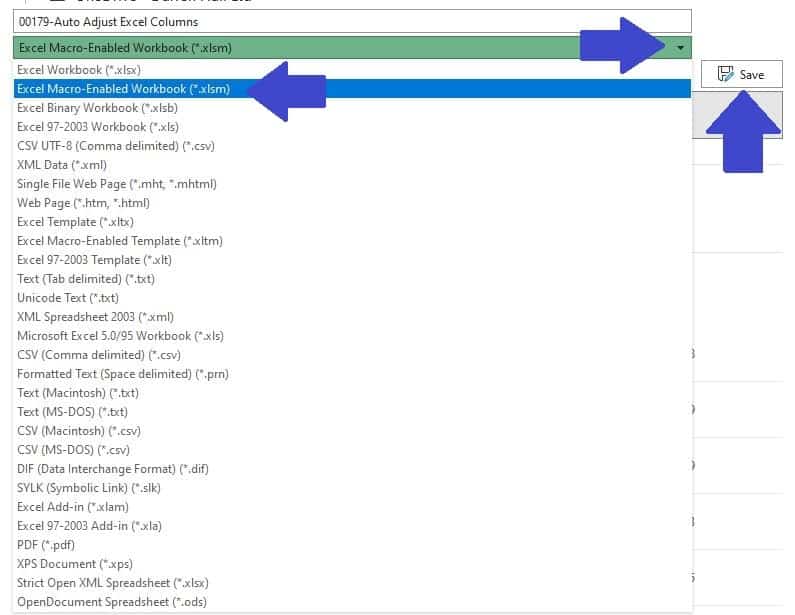
- Click ‘File‘ > ‘SaveAs‘
- Ensure your file type is ‘Excel Macro-Enabled Workbook (*.xlsm)‘ using the drop-down under your Filename.
- Click ‘Save‘.
Step 5: Test Your Code
Now, it’s time for the grand finale – testing your code to witness the magic in action!
Head over to the worksheet where you’ve implemented the code. In our walkthrough, this is ‘Sheet1‘. It’s time to put our VBA script to the test.
Let’s try it with a practical example.
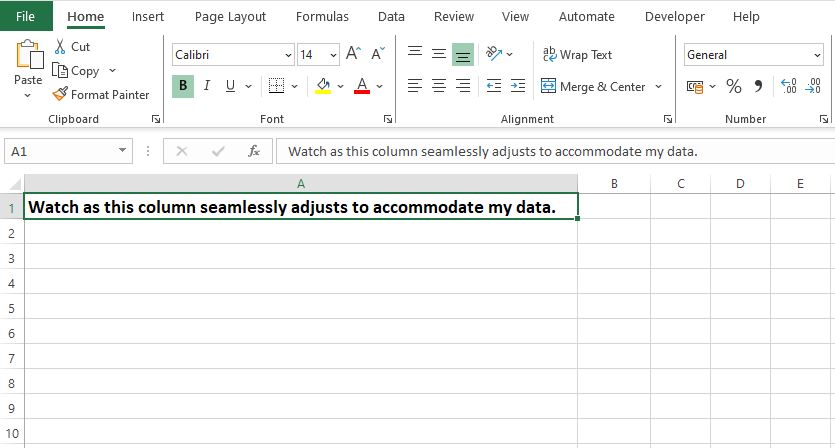
Go ahead and type a lengthy sentence in cell A1, something like, “Watch as this column seamlessly adjusts to accommodate my data.“
Once you’ve entered your text, simply press the Enter key or navigate away from the cell using any arrow key.
Here’s where the wonder happens: the ‘Worksheet_Change‘ event we’ve so meticulously coded springs into action.
You’ll see the column width automatically and smoothly adjusting itself to fully display your entered text. It’s like watching a bit of Excel magic right before your eyes!
Advanced Tips for Applying Excel Columns Autofit
As we delve deeper into mastering Excel columns autofit using VBA, we’ve already navigated through the fundamental steps and witnessed its implementation on individual sheets.
But what if your spreadsheet demands go further?
From honing in on specific columns, spreading the autofit feature across numerous sheets, to even integrating it throughout your entire workbook, there’s a plethora of advanced strategies and insights that can elevate your Excel journey.
Limit Script to Specific Columns
If you want the auto-adjustment feature to apply only to specific columns, modify the script accordingly.
For instance, if you only want columns A and B to auto-fit, use the following code in the worksheet’s code area:
Private Sub Worksheet_Change(ByVal Target As Range)
    On Error Resume Next
    If Not Intersect(Target, Me.Columns("A:B")) Is Nothing Then
        Columns("A:B").AutoFit
    End If
    On Error GoTo 0
End Sub
This code checks if the changed cell is in columns A or B (Me.Columns(“A:B”)) and only then applies the AutoFit method.
Applying the Script to Multiple Sheets
To apply this functionality to multiple sheets in the same workbook, you’ll need to copy the code into the code area of each sheet you want it to apply to.
Unfortunately, VBA doesn’t support a native method to automatically apply the same script across multiple sheets without manually pasting the code into each sheet’s code section.
Workbook-wide Application
For a workbook-wide application, where any change in any sheet adjusts column widths, you can use the “Workbook_SheetChange” event. This is placed in the “ThisWorkbook” section of the VBA editor.
Here’s an example:
Private Sub Workbook_SheetChange(ByVal Sh As Object, ByVal Target As Range)
    On Error Resume Next
    Target.EntireColumn.AutoFit
    On Error GoTo 0
End Sub
This script will trigger whenever any cell in any sheet of the workbook is changed, adjusting the column of the changed cell to fit the new data.
It’s important to use this with caution, as it applies to every sheet in your workbook and can affect performance if your workbook contains many sheets or large amounts of data.
Avoiding Performance Issues
When applying these scripts, especially the workbook-wide script, be aware that they can potentially slow down Excel if your workbook contains a large amount of data or if you frequently make bulk changes.
To mitigate this, you might consider adding additional conditions to the script to limit when the AutoFit action is triggered.
By using these enhanced tips and considering the specific needs of your Excel tasks, you can tailor the VBA scripts to efficiently manage column widths across different scenarios in your Excel workbooks.
These customizations add a level of sophistication to your data management and presentation in Excel.
Summary
In summary, mastering Excel columns autofit with VBA is a valuable skill that enhances your data management and presentation capabilities in Excel.
This guide has walked you through the essentials, from opening the VBA editor to testing your code, ensuring that you can confidently apply these techniques to your spreadsheets.
Remember, whether it’s for a single column, specific sheets, or an entire workbook, autofitting columns in Excel ensures that your data is always presented clearly and professionally.
Embrace these skills to make your Excel experience more efficient, organized, and visually appealing.
Keep Excelling,

Ready to take your Excel skills even further? Don’t miss our next guide: ‘Learn How to Loop in Excel VBA‘. This advanced tutorial will unlock new dimensions of efficiency and automation in your spreadsheets.
Dive into the world of VBA loops and transform the way you work with Excel. Check it out now!